
Pruning
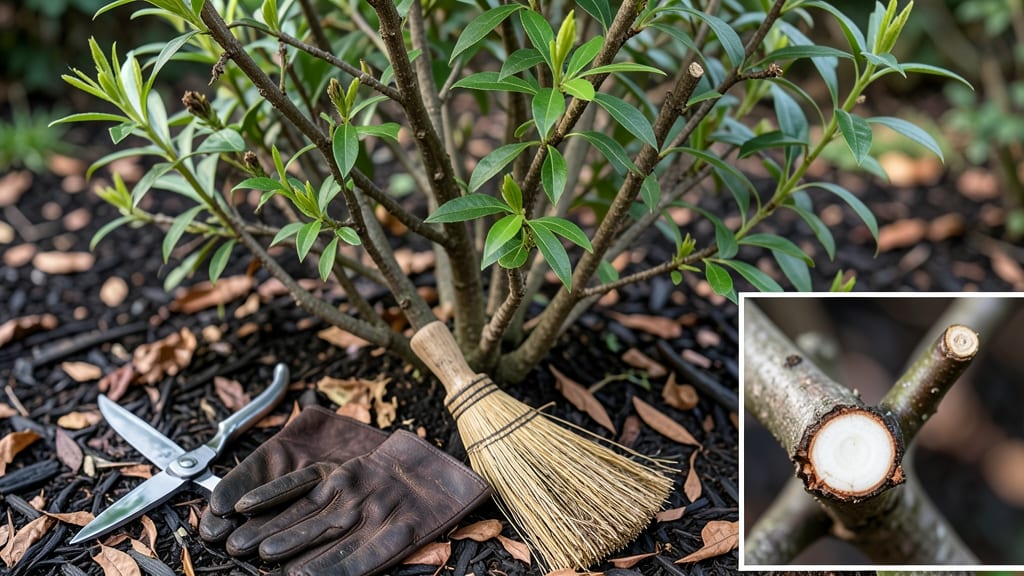
Pruning your butterfly bush in early spring isn’t just about shaping—it’s about reviving blooms before the growing season even begins. 🌿 The key is timing: wait until just before new growth starts, usually late February to early March in most regions, when the soil is workable but no buds have broken yet.
This single decision determines whether your bush explodes with flowers or struggles to recover.
You’ll need three precision cuts to achieve that lush, bushy look: first, remove any dead or damaged branches back to the main stem; second, trim last year’s growth by one-third to encourage fresh, vigorous shoots; and finally, shape the bush by cutting back overgrown branches to maintain an open center.
The goal is to strike a balance—too aggressive and you’ll delay blooms, too light and you’ll miss the chance to rejuvenate the plant.
After pruning, your butterfly bush will reward you with more abundant flowers and a stronger structure. The new growth that emerges will be fuller, the branches will be sturdier, and those signature purple blooms will arrive earlier and last longer.
Just avoid pruning in fall—it leaves the plant vulnerable to winter damage, and you’ll lose next year’s potential blooms.
For colder climates, wait until after the last frost to prune, as early cuts can expose tender wood to late freezes. In milder regions, you can prune slightly earlier, but never before the ground thaws. With these adjustments, your butterfly bush will thrive no matter where you live.
📚 In This Guide
- What you need
- Instructions
- Tips and common mistakes
- Wrapping up and next steps
What you need
- ● Pro tip: 💡 Always sharpen your tools before starting! Dull blades tear stems and invite disease. A file or sharpening stone works great for pruners and loppers.
Step-by-Step instructions for pruning butterfly bush in early spring
Here's the method I use to wake up my butterfly bushes after winter—clean cuts mean bigger blooms and healthier growth.
✂️ Step 1: Remove Dead or Damaged Wood First
Start by inspecting every branch for signs of winter damage. Look for stems that are completely brown, brittle, or hollow—these won't regrow. I grab a pair of clean, sharp pruners and cut these stems back to the base, making the cut just above a healthy bud or lateral branch.
Don't worry about being perfect here—your goal is to remove anything that looks questionable. You'll know you're on the right track when you're left with mostly green, flexible stems. This first cut opens up the center of the bush so light and air can reach all the way through.
✂️ Step 2: Thin Out Overcrowded Branches
Now focus on the interior of the plant where branches have grown too close together. I look for stems that cross each other or grow inward—they compete for sunlight and nutrients. Using your pruners, cut these back to their point of origin, making the cut at a slight angle about ¼ inch above a bud or side branch.
Here's the thing—you want to maintain an open, vase-like shape. Aim to remove about 25-30% of the plant's total volume during this step. If you're unsure, step back and look at the bush from all sides—you should see light easily moving through the center.
✂️ Step 3: Shape and Renew Growth Habits
For the final cut, I focus on shaping the bush while encouraging new growth. Start by removing any weak, spindly branches that grew last season but didn't develop properly. Then, cut back the strongest stems by about ⅓ of their length—this stimulates bushier growth and more flowers.
Make your cuts just above a set of healthy buds or leaves. I like to leave the outer framework of branches intact while opening up the center. This creates a natural, balanced shape that looks great and produces more blooms. Avoid cutting into old wood that's thicker than your thumb—these stems rarely regrow well.
🌿 Step 4: Clean Up and Protect Your Plant
After all your cuts, gather up the pruned branches and dispose of them properly. Don't compost them if they showed signs of disease—just toss them in the trash. Wipe down your pruners with rubbing alcohol to prevent spreading any potential pathogens.
Now give your butterfly bush a light watering to help it recover from the pruning. I like to add a balanced, slow-release fertilizer around the base to give it a nutrient boost for the growing season ahead. This is also a good time to check the soil—if it's compacted, gently loosen it around the roots to encourage better water absorption.
⏰ Step 5: Monitor and Maintain Through Spring
Watch your butterfly bush closely over the next few weeks. You should see new growth emerging from the buds you left behind—this is your reward for clean pruning. If you notice any branches that didn't respond well, you can make minor adjustments later in the season.
Here's what to watch for: new leaves should appear within 2-3 weeks of pruning, and by early summer, you should see plenty of fresh green growth. This is when your bush will start putting energy into producing those beautiful blooms that butterflies love. Remember, proper pruning now means fewer deadheading chores later in the season.
Tips & tricks for perfect butterfly bush pruning
Clean pruning transforms your butterfly bush from winter-weary to vibrant—here's how to avoid common mistakes and get pro results.
Tool Prep: Never skip sanitizing your pruners! I learned this the hard way after accidentally spreading fungal spores from one bush to another. Wipe blades with rubbing alcohol between cuts, especially if you're working with multiple plants or notice any signs of disease. Sharp pruners also make cleaner cuts that heal faster—dull blades crush stems instead of making precise cuts.
Visual Cues for Step 1: When removing dead wood in Step 1, look for stems that snap easily when bent (brittle) or have a hollow center when cut open. Healthy stems should bend slightly without breaking and feel solid when you squeeze them. The goal is to leave only what's green and flexible—everything else is either dead or struggling. This first cut is your foundation for everything that follows.
Shape Strategy: In Step 3, when cutting back strong stems by ⅓, imagine you're creating an upside-down cone shape. The outer branches should form a natural framework while the center opens up like a vase. This shape maximizes airflow and sunlight penetration, which directly translates to more blooms. I like to step back every few cuts to check my progress—you should see light easily moving through the center.
Recovery Boost: After pruning, give your bush a nutrient boost to compensate for the stress of cutting. I mix a slow-release fertilizer into the soil around the base, focusing on the outer edges where new roots will emerge. This is also the perfect time to check soil moisture—your bush will need consistent watering over the next few weeks as it recovers, especially if spring weather brings dry spells.
Pro Tips for Prune Butterfly Bush In Early Spring
- Clean pruning transforms your butterfly bush from winter-weary to vibrant—here's how to avoid common mistakes and get...
- Tool Prep: Never skip sanitizing your pruners! I learned this the hard way after accidentally spreading fungal spores...
- Visual Cues for Step 1: When removing dead wood in Step 1, look for stems that snap easily when bent (brittle) or hav...
Frequently asked questions
Got questions about pruning your butterfly bush in early spring?
You’re not alone! Here are some of the most common concerns—and expert answers—to help you prune with confidence.
When is the exact best time to prune butterfly bush in early spring?
Prune your butterfly bush right after the last frost but before new growth appears—typically late February to early April in most U.S. zones. This timing balances winter dieback and early spring regrowth. Avoid pruning too early; cold snaps can stress freshly cut stems.
Should I cut back butterfly bush all the way to the ground?
Not necessarily! While hard pruning (cutting to 6–12 inches tall) rejuvenates older bushes, light pruning (removing only dead or crossing branches) works for younger plants. Over-pruning can reduce blooms—aim for a balance based on your bush’s age and health.
What if my butterfly bush has bugs or disease after pruning?
Pruning in early spring reduces pest/disease risks, but watch for signs like yellowing leaves or sawdust-like frass (insect droppings). Treat issues post-pruning with neem oil or insecticidal soap. Sterilize pruners with rubbing alcohol to prevent spreading pathogens.
Can I prune butterfly bush in fall instead of spring?
Fall pruning is risky—it removes next year’s flower buds (which form late summer/fall) and invites rot in damp conditions. Stick to spring for best results, but if you must prune in fall, do it lightly (only dead wood) and avoid heavy cuts.
What’s the difference between “rejuvenation pruning” and regular pruning?
Regular pruning:
Trims dead/crossing branches to shape the bush.
Rejuvenation pruning: Cuts all stems to 6–12 inches tall to revive an overgrown or unproductive bush. Only do this every 3–5 years—it’s a shock to the plant!
Wrapping up and next steps
Pruning your butterfly bush in early spring isn’t just about shaping—it’s about revitalizing your plant for a show-stopping summer display! By mastering those three precision cuts (deadheading, shaping, and rejuvenating), you’ll encourage lush growth, vibrant blooms, and a healthier bush all season long. 🌿✨
Now that you’re armed with the know-how, grab those shears and get pruning! Monitor your butterfly bush over the next few weeks—you’ll soon see the difference in its energy and beauty. Happy gardening! 🌸