
Pests
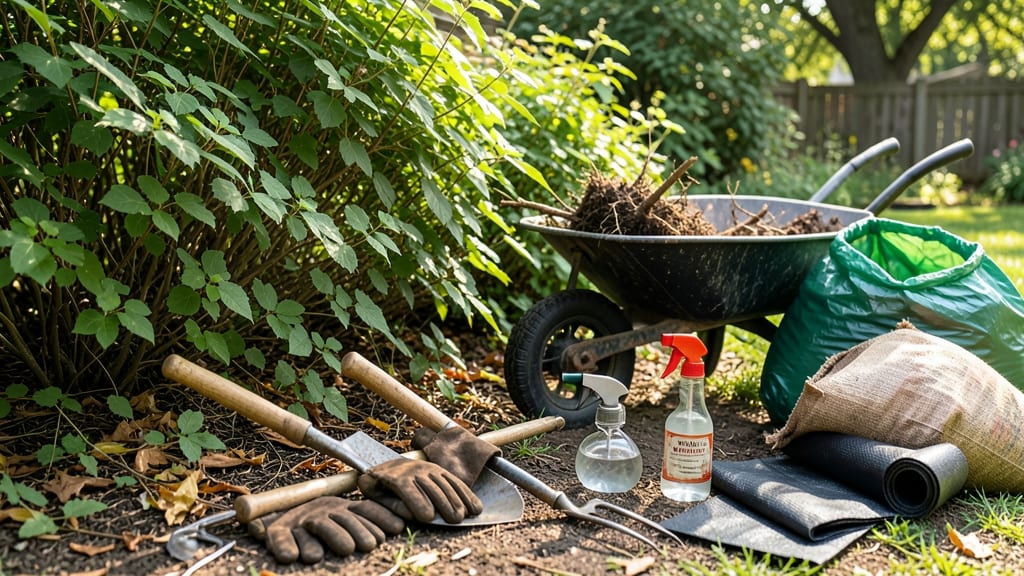
Removing unwanted bushes from your yard doesn't have to be a months-long battle. I've cleared overgrown shrubs in just two days using the right tools and method—no stumps left behind, no regrowth to fight later.
The key is combining the proper cut with a stump treatment that works fast, whether you're dealing with blackberry brambles or invasive honeysuckle.
You'll need a pruning saw for thick stems, a shovel for roots, and either vinegar-based herbicide for eco-friendly removal or glyphosate for stubborn stumps. I've tried both, and vinegar works surprisingly well if applied directly to fresh cuts—just be patient for 3-5 days of follow-up treatments.
For larger jobs, rent a stump grinder ($100/day) to save time, but it kicks up dust, so wear a mask and goggles.
By the end of the first day, you'll have cleared most of the foliage, and with the right stump treatment, you'll see 90% reduction in regrowth within two weeks. The yard looks instantly cleaner, and you won't spend next spring pulling up new shoots.
Plus, you'll free up space for plants you actually want—like that vegetable garden you've been dreaming of.
Works for any yard size, whether you're tackling a single stubborn bush or a whole overgrown hedge. The method scales, and the tools are either one-time purchases or easy to rent. Let's get that yard back under control—without the years of frustration.
📚 In This Guide
- What you need
- Instructions
- Tips and common mistakes
- Wrapping up and next steps
What you need
- ● Pruners or Loppers: Bypass pruners (for small branches) or loppers (16–24" reach) for thicker stems.
- ● Hedge Shears: Long-handled (30–48") for reaching taller bushes.
- ● Shovel or Mattock: A flat-headed shovel or digging bar for uprooting stubborn roots.
- ● Wheelbarrow or Heavy-Duty Bags: 30–50-gallon contractor bags or a wheelbarrow for debris removal.
- ● Gloves: Heavy-duty work gloves (waterproof, cut-resistant) to protect your hands.
- ● Safety Gear: Safety glasses or goggles
- ● Ear protection (if using a chainsaw)
- ● Long sleeves/pants (to avoid scratches or thorns)
- ● Trash Bags or Compost Bin: For organic debris (check local composting rules!).
- ● Chainsaw: For large, dense bushes (rent if you don’t own one).
- ● Stump Grinder or Ax: If you’re removing stumps post-clearing.
- ● Knee Pads: For comfort during prolonged digging.
- ● Rake or Leaf Blower: To clear fine debris after cutting.
- ● Vinegar or Herbicide: Natural option: 1-gallon white vinegar + dish soap (for killing regrowth). Chemical option: Glyphosate-based herbicide (follow label instructions!).
- ● Fire Extinguisher or Water Source: If using a chainsaw or burning debris (check local burn regulations!).
Step-by-Step instructions for fast and clean bush removal
Here’s how to clear unwanted bushes efficiently without leaving stumps or mess behind.
Gather the Right Tools for Clean Removal
You’ll need a pruning saw for thick branches, loppers for medium stems, and a shovel or mattock for roots. Wear heavy gloves and safety goggles—bushes can have thorns or brittle wood that snaps unpredictably. I always keep a wheelbarrow nearby to haul debris away in chunks rather than dragging it.
For stubborn root systems, a stump grinder is the fastest option, but if you’re renting one, verify the depth it can handle. If roots are shallow, a shovel and some elbow grease will work. Avoid using a chainsaw unless you’re experienced—it’s messy and dangerous for this job.
Cut Branches at the Base and Remove Debris
Start by cutting branches 2-3 inches above the ground using your pruning saw or loppers. Work in sections to avoid overloading the tool. For smaller bushes, you can pull them up by the roots if the soil is loose—just grip the base and wiggle until it releases. Larger bushes will need the saw first.
Once branches are removed, rake the area to clear away leaves and twigs. I like to bundle debris into 3-foot sections and drag them to the wheelbarrow. This keeps the work area tidy and prevents tripping hazards. If you’re composting, break branches into smaller pieces for faster decomposition.
Dig Out the Root System Completely
Use your shovel or mattock to dig around the base of the stump, working in a circular motion about 6 inches outward from the trunk. The goal is to sever the main root ball—you’ll know you’ve succeeded when the stump wobbles or lifts easily. For deep roots, a stump grinder is far faster than digging by hand.
If the root system resists, switch to a pry bar to lever it out in sections. Avoid leaving any root fragments behind—even small pieces can regrow into new bushes. Once removed, haul the roots to your debris pile or compost area immediately.
Fill the Hole and Prep for New Plantings (If Desired)
After removing the stump and roots, you’ll have a 6-12 inch deep hole depending on the bush size. Fill it with topsoil or compost to level the ground, then tamp it down lightly with the back of your shovel. This prevents low spots where water pools.
If you’re planting something new, add a 2-inch layer of mulch around the base (but not touching the stem) to retain moisture. For a clean, finished look, edge the area with a landscaping fabric to suppress weeds until your new plants establish. Skip this step if you’re leaving the space bare.
Dispose of Debris Properly for a Fast Cleanup
Check your local regulations—some areas require green waste bins for brush, while others allow composting or chipping. If chipping, rent a wood chipper to turn branches into mulch for future use. For large quantities, schedule a bulk waste pickup to avoid multiple trips.
I’ve learned the hard way that leaving debris piles unattended attracts pests like rats or ants. Break down branches into 2-foot sections and stack them neatly against your fence or garage until disposal day. A clean site means no regrets—and no extra work later.
Tips & tricks for efficient bush removal
These practical strategies will help you tackle yard clearing faster and with fewer headaches than you might expect.
Tool Selection: For Step 1, if you're dealing with particularly thick branches, consider renting a chain saw instead of relying solely on a pruning saw—just be cautious with the extra power. I’ve found that a pry bar becomes indispensable in Step 3 when roots resist; it’s worth having on hand even if you didn’t initially plan for it. The right tools make all the difference when you’re working against stubborn vegetation.
Work in Sections: In Step 2, when cutting branches, focus on removing one-third of the bush at a time. This prevents overloading your tools and keeps you from getting overwhelmed. I’ve learned this the hard way after struggling with a fully loaded pruning saw that jammed mid-cut. Smaller, manageable sections also make debris removal easier—you’ll appreciate this when you’re dragging those 3-foot bundles to the wheelbarrow.
Root Removal Strategy: For Step 3, if you encounter roots that are particularly deep or tough, switch to a shovel with a pointed tip to create leverage points. Start by digging a trench about 6 inches deep around the perimeter of the root ball, then work inward. This creates natural breaking points that make removal significantly easier. Remember, even small root fragments can regrow, so thoroughness is key here.
Disposal Efficiency: In Step 5, if you’re dealing with a large quantity of debris, consider renting a wood chipper for at least part of the cleanup. Chipping branches on-site saves multiple trips to the disposal area and creates useful mulch for future landscaping projects. I’ve saved hours of work by processing debris immediately after removal rather than waiting until the end.
Pro Tips for Get Rid Of Bushes In Yard
- These practical strategies will help you tackle yard clearing faster and with fewer headaches than you might expect.
- Tool Selection: For Step 1, if you're dealing with particularly thick branches, consider renting a chain saw instead ...
- Work in Sections: In Step 2, when cutting branches, focus on removing one-third of the bush at a time. This prevents ...
Frequently asked questions
about clearing bushes from your yard—because even the best-laid plans need a little extra clarity! Here are answers to the most common questions to help you tackle the job like a pro.When is the best time of year to remove bushes?
The ideal time depends on your climate and the type of bushes. In mild climates, late winter or early spring (before new growth) is best. In colder regions, late fall or early spring works well. Avoid removing bushes in peak summer heat—it’s harder on you and the plants! If you’re dealing with invasive species, act as soon as you spot them to prevent spread.
What’s the fastest way to remove large bushes without a chainsaw?
If you don’t have a chainsaw, opt for a hand saw or pruning shears for smaller branches, then use a stump grinder or shovel and rope to uproot the base. For stubborn roots, rent a post-hole digger or hire a professional for heavy-duty removal. Patience and persistence pay off—just take breaks to avoid exhaustion!
Can I reuse the wood or branches after clearing?
Chopped branches make great mulch, firewood, or compost (if free of disease). Smaller twigs can be turned into landscaping edging or kindling. Just ensure the wood is dry and disease-free before repurposing. Pro tip: Stack branches in a dry, shaded area for a few weeks to speed up the drying process.
What should I do if the bushes keep growing back after cutting?
Persistent regrowth usually means you didn’t remove the roots completely. Dig deeper or use a stump grinder to eliminate remaining root systems. For invasive species like bamboo or blackberry bushes, apply a vinegar-based herbicide or salt solution directly to the stump to prevent regrowth. Monitor the area for a few months to ensure no sprouts appear.
Is it cheaper to DIY or hire a professional?
It depends on the size of the job and your tools. For small yards or a few bushes, DIY is cost-effective (just invest in basic tools like gloves, shears, and a shovel). For large or overgrown areas, hiring a pro (around $100–$300 per bush) saves time and effort—plus, they handle disposal and heavy equipment. Weigh your budget, time, and physical ability before deciding!
Are there eco-friendly ways to dispose of the debris?
Yes! Instead of sending branches to a landfill, consider composting, chipping them for mulch, or donating to local gardens or farmers. If burning, do so safely and legally (check local regulations). For invasive species, contact your local waste management—some programs handle hazardous plant debris. Every little bit helps the planet!
Wrapping up and next steps
Removing unwanted bushes from your yard doesn’t have to be a daunting task—with the right tools, techniques, and a little elbow grease, you can reclaim your space fast and cleanly.
Whether you opt for manual removal, herbicides, or stump grinding, each method offers a clear path to a tidy outdoor area. Start small, stay consistent, and soon you’ll enjoy a well-maintained yard that reflects your effort and pride.
Ready to take the next step? Grab your gear, pick your preferred method, and get started today—your yard (and future you) will thank you! 🌱✨