
Pruning
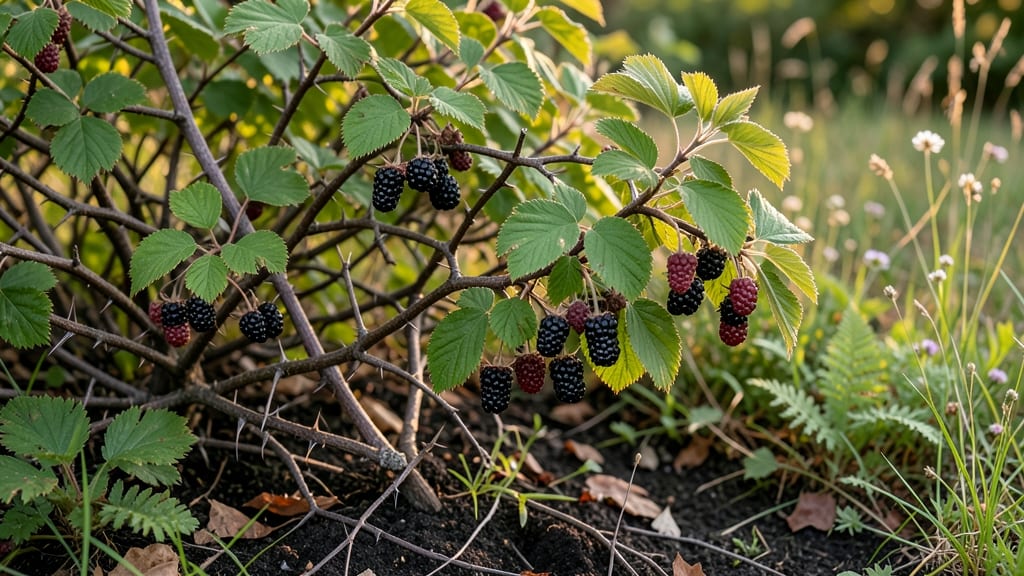
Your bramble berry bush could produce fruit twice a year if you prune it right. ✂️ I’ve turned my once-neglected blackberry patch into a year-round berry machine by mastering the timing and technique—no fancy tools required.
The secret lies in understanding when to cut back for spring growth and when to encourage late-season fruiting. Most gardeners overlook the three-pruning rule: cut back old canes in late winter, shape new growth in summer, and trim lightly after harvest.
My thornless variety now gives me berries from June through September with minimal effort. The key is balancing aggressive pruning with plant health—too much, and you lose next year’s harvest; too little, and the bush gets tangled.
You’ll end up with a neat, productive bramble that’s easy to harvest and resists diseases. The berries stay sweeter longer, and the canes produce more fruit each season. This method works for raspberries too, but blackberries and boysenberries respond best to the aggressive approach.
Works in zones 5-9, though winter care varies by region. Let’s get those canes shaped for a bounty you’ll actually enjoy picking!
📚 In This Guide
- What you need
- Instructions
- Tips and common mistakes
- Wrapping up and next steps
What you need
- ● Pruning shears: Sharp, bypass-style shears (1 pair) for clean cuts—avoid anvil shears to prevent crushing stems.
- ● Loppers: Heavy-duty (24–32" length) for thicker branches (2–3" diameter).
- ○ Pruning saw: Curved-tooth saw (for branches >3" thick, optional but handy for mature bushes).
- ● Gloves: Heavy-duty, cut-resistant gloves (1 pair) to protect from thorns and sap.
- ● Disinfectant: 70% isopropyl alcohol or rubbing alcohol (small bottle) to sterilize tools between cuts.
- ○ Marking twine or flags: (Optional) For labeling canes you’re keeping vs. removing.
- ● Timing: Prune in late winter or early spring (before buds swell) for best results. Avoid pruning during frost or wet weather.
- ● Safety gear: Long sleeves/pants (thorn protection), closed-toe shoes, and safety glasses (if working near your face).
- ● Weather check: Choose a dry, calm day (humidity can spread fungal diseases).
- ● Cleanup supplies: Heavy-duty trash bags (2–3) for debris and a wheelbarrow or bucket for hauling clippings.
- ● Pruning sealant: (For large cuts >1" diameter) to prevent disease entry—only use on healthy wood.
- ● Garden hose: For rinsing tools post-pruning and keeping the work area tidy.
- ● Notebook or app: To log pruning dates, cane counts, and growth patterns for future reference.
- ● Mulch: Straw or wood chips (post-pruning) to retain moisture and suppress weeds around the base.
Step-by-step pruning guide for bramble berry bushes
Here's how I transform tangled brambles into productive, manageable bushes that reward you with fruit all season.
✂️ Step 1: Prune in Late Winter Before New Growth Begins
Timing is everything with brambles. Wait until late winter when the ground is still frozen—this prevents disturbing overwintering pests. I like to prune in February or early March before buds swell but after the worst cold snaps have passed. You'll know it's time when the canes are dormant and the soil is too hard to dig.
Start by removing dead, diseased, or weak canes at the base with clean, sharp loppers. These are easy to spot—they're brown, brittle, or hollow. Cut them back to the ground immediately. Never leave stubs, as they invite fungal infections. For healthy canes, trim back one-third of the oldest wood each year to encourage new growth. This keeps the bush vigorous and prevents overcrowding.
✂️ Step 2: Thin Canes to Improve Airflow and Fruit Production
Bramble berry bushes produce best when canes are 6-8 inches apart and receive plenty of sunlight. After removing the dead wood, select 3-5 of the strongest, most upright canes to keep. These should be 1-2 inches in diameter at the base and free of knots or damage. Thin out the rest, cutting them back to the ground.
Here's the thing—brambles fruit on second-year wood, so don't over-prune. You want a mix of last year's canes (which bear fruit) and this year's new growth (which will fruit next year). If you remove too many canes, you'll sacrifice next year's harvest. Watch for canes that cross or rub against each other—these need to go to prevent disease.
✂️ Step 3: Shape the Bush for Better Harvesting Access
Once you've thinned the canes, shape the bush into an open, vase-like structure. This makes it easier to reach the fruit and improves airflow, which reduces rot. Start by selecting 3-4 main branches to form the skeleton of the bush. Prune these back to buds facing outward to encourage an open growth habit.
For the remaining canes, cut back to buds that will fill gaps in the structure. Avoid cutting too close to the bud—leave ¼ inch of stem to prevent damage. If you're unsure which buds to keep, look for ones that are plump and slightly raised (these are the strongest). Step back occasionally to visualize the shape—you want sunlight to reach the center of the bush, not just the edges.
🌿 Step 4: Summer Maintenance Pruning for Ongoing Health
After the initial winter pruning, brambles need light maintenance throughout the growing season. In early summer, remove any suckers (thin, fast-growing shoots) that emerge at the base of the bush. These drain energy from the main canes and don't produce fruit. Cut them off at the base with a sharp knife or pruners.
Also, keep an eye out for water sprouts (vertical shoots growing from the main canes). These are weak and won't bear fruit, so prune them back to a lateral bud. Finally, deadhead spent flowers in late summer to encourage new growth and extend the fruiting season. You'll know when to do this—the flowers turn brown and the berries stop ripening.
⏰ Step 5: Post-Harvest Cleanup to Prepare for Next Year
Once the berries are picked and the leaves start to yellow, it's time for a final prune. In late fall, remove any remaining dead or diseased canes and rake up fallen leaves to reduce pest and disease pressure. This is also a good time to fertilize lightly if your soil is poor—use a balanced, slow-release fertilizer to support next year's growth.
Don't prune in fall, though. Wait until late winter to do the heavy pruning. Fall pruning stimulates new growth that won't harden off before winter, leaving it vulnerable to cold damage. Instead, focus on cleanup and protection. Mulch the base of the bush with 2-3 inches of organic mulch to insulate the roots and retain moisture. This sets the stage for a productive harvest next season.
Tips & tricks for perfect bramble berry bush pruning
Transforming your tangled bramble berry bush into a productive powerhouse takes precision—and these insider tips will help you avoid common mistakes that sabotage harvests.
The Timing Secret: The February or early March window for late winter pruning is non-negotiable. If you prune too early, you risk disturbing overwintering pests still hiding in the canes. If you wait too late, new growth begins and you'll cut off potential fruit-bearing canes. I always check for frozen ground first—it's the best indicator you've timed it right.
Tool Technique: Never use dull loppers or shears—they crush stems instead of making clean cuts, which invites disease. I invest in bypass pruners with sharp, replaceable blades and always clean them with rubbing alcohol between cuts. For thicker canes over 1 inch in diameter, use a pruning saw to avoid tearing the bark. The cleaner the cut, the faster the wound seals and the less stress on the plant.
Visual Cane Selection: When choosing which canes to keep in Step 2, look for plump, slightly raised buds facing outward—they're your strongest growth indicators. I run my fingers along the canes to feel for smooth, unblemished surfaces with good sap flow. Avoid canes with knots, scars, or excessive thorns, as these often signal weak structural integrity. Remember, you're selecting for next year's fruit production.
Year-Round Maintenance Strategy: Mark your calendar for three key pruning events—late winter (heavy pruning), early summer (sucker removal), and late fall (cleanup). I keep a small pruning kit in my shed with a notebook where I record which canes I pruned each year. This helps me track the 3-year cane lifecycle of brambles: first-year growth, second-year fruiting, third-year decline. This record-keeping prevents me from accidentally removing productive canes.
Pro Tips for Bramble Berry Bush
- Transforming your tangled bramble berry bush into a productive powerhouse takes precision—and these insider tips will...
- The Timing Secret: The February or early March window for late winter pruning is non-negotiable. If you prune too ear...
- Tool Technique: Never use dull loppers or shears—they crush stems instead of making clean cuts, which invites disease...
Frequently asked questions
about bramble berry bushes—whether you're a seasoned gardener or just starting—can save you time and frustration. Here are some of the most common questions answered!When is the best time to prune a bramble berry bush?
Prune your bramble berry bush in late winter or early spring, just before new growth begins. This timing ensures you remove dead wood while leaving healthy canes to produce fruit. Avoid pruning in fall, as it can expose the bush to winter pests and diseases.
How much should I cut back my bramble berry bush?
Remove about one-third of the oldest canes each year to encourage new growth. Cut back to the ground any canes that are dead, diseased, or unproductive. Keep a mix of young and mature canes for a balanced harvest. Over-pruning can reduce fruit production, so don’t go overboard!
Will pruning affect my berry harvest?
Yes—but in a good way! Pruning boosts fruit quality and quantity by improving airflow and sunlight exposure. Removing old canes redirects energy to younger, more productive growth. Just avoid heavy pruning in the year you expect a big harvest, as new canes need time to mature.
What should I do if my bramble berry bush gets pests after pruning?
If you notice pests like aphids, spider mites, or birds pecking at berries, act fast! Neem oil or insecticidal soap works well for soft-bodied pests. For birds, use netting over ripe clusters. Prune early and thoroughly to reduce hiding spots for pests in dense foliage.
Can I grow bramble berries in containers instead of a garden bed?
Bramble berries thrive in large containers (at least 15 gallons) with well-draining soil. Choose dwarf varieties like ‘Aron’ or ‘Chehalem’ for smaller spaces. Just ensure the pot gets full sun (6+ hours/day) and prune aggressively to control size. Containers also make winter protection easier!
Wrapping up and next steps
Growing a thriving bramble berry bush with year-round harvests is totally within reach—just remember: timing, technique, and a little patience are your best friends! 🌱 With the right pruning tools, seasonal strategies, and a watchful eye for pests, you’ll soon be enjoying juicy berries for months.
Whether you’re a pruning pro or just starting, every snip brings you closer to a bountiful garden.
Ready to take the next step? Mark your calendar for your first pruning session this fall—your future harvests will thank you! 🍇🌿