
Propagation
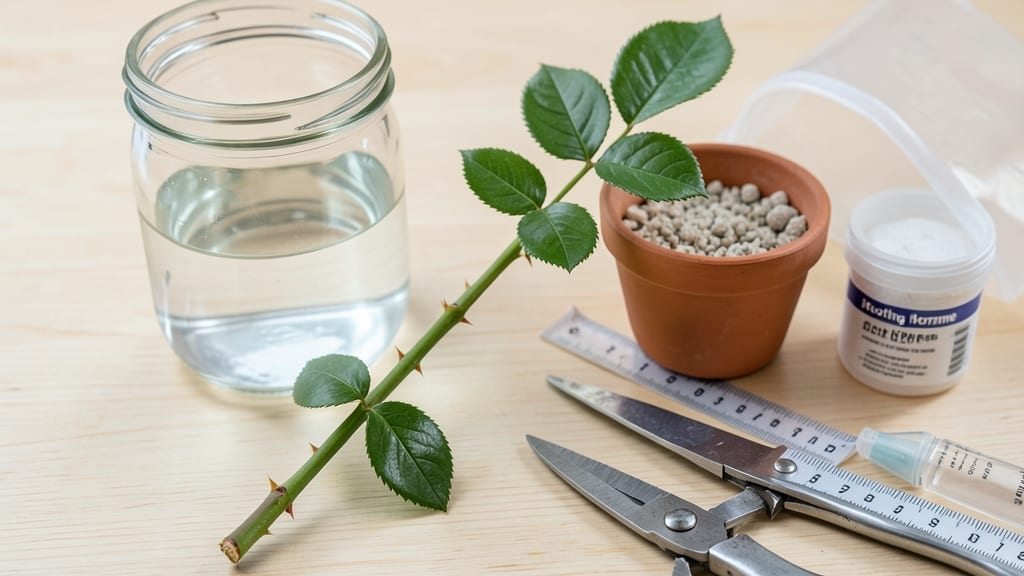
How to start a rose bush from a stem feels like magic—especially when you skip the nursery and grow your own. 🌹 The secret lies in knowing when to cut, how to prepare the stem, and whether to root it in water or soil. I’ve rooted dozens of roses this way, and the best time to start is late spring or early summer, when new growth is vigorous but not yet hardened off. You’ll need sharp pruners, a healthy stem with at least three buds, rooting hormone (optional but helpful), and either a glass of water or well-draining soil mix. The process is simple but requires patience—roots take 4-6 weeks to form. I’ve had cuttings sprout roots in just two weeks, while others took nearly two months, so don’t rush it. Once roots appear, you’ll transplant the cutting into soil and watch as it grows into a full bush with dozens of blooms by next season. The first flush of leaves signals success, and before you know it, you’ll have a rose bush that’s uniquely yours—no tags, no store-bought limitations. This method works for hybrid teas, floribundas, and even climbing roses. Just avoid old wood or diseased stems, and keep humidity high during rooting. Here’s how to do it right the first time!
📚 In This Guide
- What you need
- Instructions
- Tips and common mistakes
- Wrapping up and next steps
What you need
- ● Rose stem: A healthy, non-flowering stem (4–6 inches long) with at least 3–5 leaf nodes. Cut it at a 45-degree angle just below a node using clean, sharp pruners.
- ○ Rooting hormone (optional but recommended): A small bottle (1 oz) of powder or gel to boost root growth.
- ● Water (for water propagation): A clean glass or jar (8–12 oz) filled with room-temperature water.
- ● Well-draining soil (for soil propagation): A 6-inch pot filled with a mix of 50% perlite or sand + 50% potting soil.
- ● Plastic bag or humidity dome: A clear plastic bag (gallon-sized) or a small propagator to create a greenhouse effect.
- ● Rubbing alcohol (70% or higher): A small bottle to sterilize tools and cut stems.
- ● Spray bottle: Filled with water to mist the cutting and maintain humidity.
- ● Rooting cubes: Peat or coconut fiber cubes to provide a sterile, moisture-retentive medium.
- ● Fertilizer (low-nitrogen): A diluted dose (½ strength) of a rooting fertilizer to speed up growth.
- ○ Heat mat (optional for soil propagation): A small mat (70–75°F range) to keep roots warm.
- ● Plant labels: To track your new rose’s progress!
Step-by-Step instructions for propagating roses from stem cuttings
Here's how I've successfully grown new rose bushes from cuttings—no fancy equipment needed.
🌱 Step 1: Select and Prepare the Stem
Choose a healthy stem from this year's growth, about 4-6 inches long with at least 3-4 nodes (those little bumps where leaves grow). Use clean, sharp pruners to cut just below a node at a 45-degree angle. This angled cut increases surface area for root growth.
Remove all but the top 2-3 leaves—fewer leaves mean less moisture loss while roots develop. Strip off any lower leaves that would sit below the soil line. I like to make a small slit in the stem just below a node with a sharp knife—this encourages root growth from that spot.
💧 Step 2: Choose Your Rooting Method
For water propagation, place the prepared stem in a clean glass jar filled with room-temperature water until the bottom 1-2 inches are submerged. Change the water every 2-3 days to prevent bacterial growth. You'll see roots forming in 2-4 weeks—watch for tiny white tendrils at the stem's base.
For soil propagation, dip the cut end in rooting hormone powder (optional but helpful). Plant the stem 2 inches deep in a pot of moist potting mix, keeping the top 2 leaves above soil. Cover the pot with a clear plastic bag to retain humidity and place it in bright, indirect light. Keep the soil consistently moist but not soggy.
☀️ Step 3: Provide Ideal Conditions for Growth
Both methods need bright, indirect light—a sunny windowsill works well, but avoid direct midday sun that can overheat the cuttings. Water-propagated stems need fresh water every 2-3 days until roots reach 2 inches long. Soil-propagated stems need regular misting to maintain humidity inside the plastic bag.
You'll know it's working when new leaves appear. For water cuttings, transfer to soil once roots are 2 inches long. For soil cuttings, remove the plastic bag after 4-6 weeks when you see new growth. This gradual transition prevents transplant shock.
🌿 Step 4: Transition to Permanent Growth
Once roots are established and new growth appears, it's time to move your cutting to its permanent home. For water-rooted cuttings, plant in a pot with well-draining soil, burying the stem up to the first set of leaves. For soil-rooted cuttings, gradually increase exposure to outdoor conditions over 1-2 weeks before planting.
Keep newly planted cuttings in partial shade for 1 week to help them adjust. Water deeply but infrequently—overwatering is the fastest way to kill new roots. You'll see steady growth in 4-6 weeks, signaling your rose bush is thriving.
Tips & tricks for perfect rose propagation
Here's what nobody tells you about growing roses from cuttings that'll make all the difference.
Stem Selection Tip: Look for stems that are about pencil-thick—thicker than a straw but not as thick as your finger. These stems have the perfect balance of maturity and flexibility. I've found that stems from the middle section of the plant (not the very top or bottom) root most reliably. Avoid stems with flowers or buds—they'll drain energy from root development.
The Angle Matters: When you make that 45-degree cut below a node in Step 1, the angle isn't just for looks—it creates more surface area for roots to emerge. I like to use a sharp knife and make the cut cleanly, then immediately place the stem in water to prevent it from drying out. If you don't have a sharp knife, clean scissors work in a pinch, but they can crush the stem.
Rooting Hormone Hack: While rooting hormone is optional, I've found it cuts the rooting time by about 30% when using soil propagation. If you don't have it, a pinch of cinnamon or even honey works in a pinch—both have natural antifungal properties. Just dip the cut end briefly before planting. For water propagation, skip this step entirely since the water environment is naturally sterile.
Lighting Secret: Bright, indirect light is crucial—direct sun can cook your cuttings while too little light means weak, leggy growth. I place mine on an east-facing windowsill where they get morning sun but are protected from harsh afternoon rays. If you don't have good natural light, a simple grow light on a timer for 12-14 hours daily works wonders. Watch for leaves that look pale or stretched—they're begging for better light!
Pro Tips for Start A Rose Bush From A Stem
- Here's what nobody tells you about growing roses from cuttings that'll make all the difference.
- Stem Selection Tip: Look for stems that are about pencil-thick—thicker than a straw but not as thick as your finger. ...
- The Angle Matters: When you make that 45-degree cut below a node in Step 1, the angle isn't just for looks—it creates...
Frequently asked questions
Got questions about growing roses from cuttings? You're not alone! Here are some of the most common queries—and their answers—to help you succeed with this rewarding (and budget-friendly) gardening hack.
Can I root a rose stem from any rose bush?
Not all roses propagate easily! Look for own-root roses (like hybrid teas, floribundas, or climbers) or grafted roses below the graft union. Avoid roses treated with growth inhibitors (like some commercial varieties) or those with chemical sprays—stick to organic, healthy stems for best results.
How long does it take for a rose cutting to root?
Patience is key! In water, roots typically appear in 2–4 weeks (sometimes longer). In soil, it can take 4–8 weeks—or even months. Keep the cutting in bright, indirect light and maintain consistent moisture. Once you see 1–2 inches of roots, it’s ready to plant!
Should I use water or soil to root my rose cutting?
Both work, but each has pros:
- Water: Lets you monitor root growth (great for beginners!). Change water every 3–5 days to prevent bacteria.
- Soil: Encourages faster rooting (less transplant shock later) but hides progress. Use a well-draining mix (like perlite + peat) to avoid rot.
Pro tip: Try both methods with spare cuttings to compare!
What do I do if my rose cutting starts rotting?
Don’t panic—rotting is often fixable! If the stem softens or smells foul:
- Trim off the mushy part with sterile scissors.
- Dip the cut end in cinnamon powder or hydrogen peroxide (3%) to prevent infection.
- Repot in fresh, dry medium (water or soil) and reduce moisture.
If the cutting is beyond saving, grab another stem—roses are resilient!
When is the best time to take rose cuttings?
The ideal window is late spring to early summer (when new growth is pencil-thick and healthy). Avoid extreme heat or cold—60–75°F (15–24°C) is perfect. If you miss this, fall cuttings (before the first frost) can also work, though they root slower.
Wrapping up and next steps
Starting a rose bush from a stem is a rewarding journey that blends patience with the magic of nature! 🌱 With just a few simple steps—whether in water or soil—you’ve got the power to grow a thriving rose plant from a single cutting.
The key is consistency, whether it’s keeping your stem hydrated or ensuring proper light exposure.
Now that you’re armed with the know-how, give it a try! Grab a stem from your favorite rose bush, follow the steps, and watch your green thumb grow. And once your cutting takes root, share your success—whether with friends, family, or your social media garden crew. Happy propagating! 🌸