
Pests
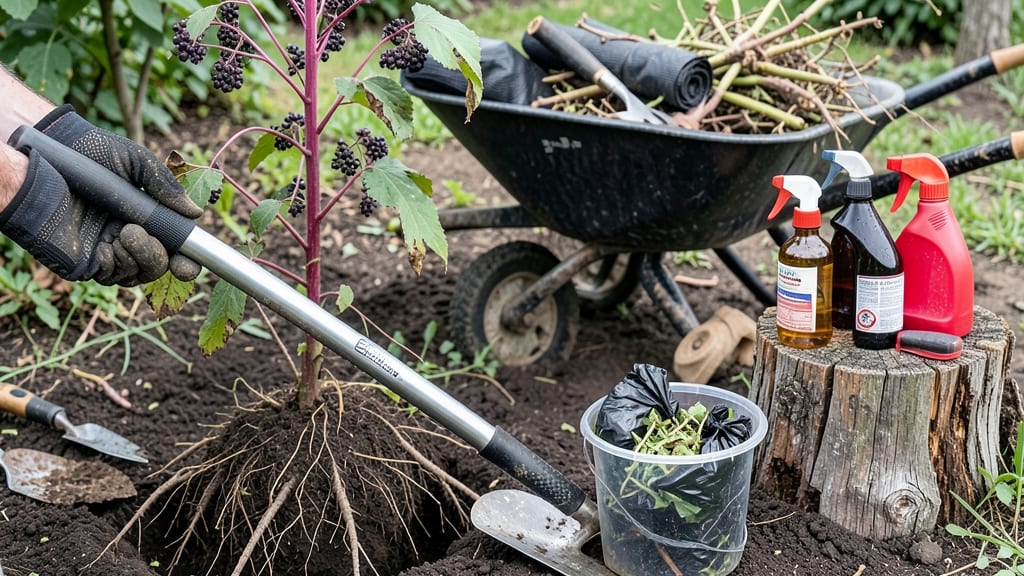
Sticker bushes turn your yard into a thorny nightmare. 🌿 I’ve wrestled with these spiky invaders for years, and I’ve finally cracked the code on removal—without chemicals or back-breaking work. The key is timing, tools, and a little elbow grease.
These bushes spread aggressively, so the first step is cutting them down at the base with thick gloves and long sleeves—thorns are no joke. Then dig out the roots, which can stretch 3-4 feet deep. For stubborn patches, repeat every few weeks until the ground stays clear.
You’ll know you’ve won when fresh grass or mulch grows back without any new shoots. The trick is staying patient—it might take a season, but the payoff is a yard you can actually enjoy without fear of pricking your fingers.
Bonus: Once gone, keep an eye out for seedlings. A thick layer of cardboard or landscape fabric suppresses regrowth, and regular checks keep your yard sticker-free for good.
Root Causes Of Stubborn Sticker Bushes
Sticker bushes—those prickly, invasive plants—don’t just pop up by accident. They thrive because of specific environmental and biological factors that give them an unfair advantage over your lawn or garden.
Understanding why they take over is the first step to reclaiming your space. Let’s break down the science behind their persistence.
Sticker bushes (like Celtis or Berberis species) love soil that’s packed with nutrients and moisture—think of it as their all-you-can-eat buffet. Here’s why this happens:
- Excessive Fertilizer Use: Too much nitrogen or phosphorus in your soil creates the perfect growing conditions for weeds and invasive plants. These nutrients encourage rapid root and shoot growth, giving sticker bushes a competitive edge over grasses or flowers.
- Poor Drainage: Waterlogged or compacted soil traps moisture, which sticker bushes adore. Their roots thrive in damp conditions, while many native plants struggle to compete.
- Organic Matter Buildup: Leaves, grass clippings, or mulch decomposing in one spot can create "hot spots" of fertility. Sticker bushes detect these nutrient-rich zones and colonize them aggressively.
Pro Tip: 🌡️ Conduct a simple soil test to check pH and nutrient levels. If your soil is too rich, amend it with sand or compost to dilute nutrients and discourage sticker bush growth.
Sticker bushes are opportunistic—when they sense weak competition, they move in like squatters. Here’s how this plays out:
- Thin or Dying Lawns: Bare patches or stressed grass leave open space for sticker bushes to sprout and spread unchecked. Their seeds germinate easily in disturbed or sun-exposed soil.
- Monoculture Landscaping: Planting the same species repeatedly (e.g., a lawn of just Kentucky bluegrass) creates a weak ecosystem. Diverse, healthy plants naturally suppress weeds through root competition and shade.
- Overgrazing or Foot Traffic: Trampled areas or heavily used paths create disturbed soil, which sticker bushes exploit. Their seeds lie dormant until the ground is disturbed, then germinate within days.
Pro Tip: ✨ Overseed bare spots with a mix of native grasses or ground covers to crowd out sticker bushes before they take root.
Sticker bushes are sun worshippers—they thrive in full sunlight, which gives them an energy boost to outcompete shade-loving plants. Here’s the breakdown:
- Direct Sun Exposure: These plants use photosynthesis to fuel rapid growth. In sunny areas, they produce more seeds and grow taller, shading out weaker competitors.
- South- or West-Facing Yards: These spots get the most intense sunlight, creating ideal conditions for sticker bushes. If your yard is mostly open and sunny, you’re essentially inviting them to move in.
- Thinning Tree Canopy: Removing trees or shrubs can increase sunlight penetration, turning your yard into a sticker bush paradise overnight.
Pro Tip: 🌳 Plant tall, dense shrubs or trees strategically to create shade and reduce sunlight exposure in problem areas.
Birds, squirrels, and even wind play a role in spreading sticker bush seeds far and wide. Here’s how it works:
- Fruits That Attract Animals: Many sticker bushes produce berries or small fruits that birds and mammals eat—and then deposit the seeds elsewhere via their droppings. This can spread infestations across yards and neighborhoods.
- Wind-Dispersed Seeds: Some species release lightweight seeds that travel on the breeze, landing in cracks, driveways, or garden beds.
- Human Activity: Accidentally transporting soil or plants from one location to another (even on shoes or tools) can introduce sticker bush seeds to new areas.
Pro Tip: 🦉 Monitor bird activity in your yard. If you notice birds feasting on berries from sticker bushes, take steps to remove the plants before they spread further.
Now that you know why sticker bushes take over, you’re armed with the knowledge to tackle them head-on. The next step? Natural removal methods that actually work.
Practical ways to remove sticker bushes
Now that you understand why those pesky sticker bushes (or Cuscuta vines) keep invading your garden, it’s time to tackle them head-on! 🌱🚫 The good news? You don’t need harsh chemicals to win this battle—just a few targeted strategies tailored to the root cause.
Below, we’ll break down the best methods to eliminate existing infestations and keep them from coming back, whether they’re choking your plants, sprawling across your lawn, or hitching a ride on your prized flowers.
---
Sticker bushes thrive by latching onto healthy hosts, draining their nutrients. Your first line of defense? Cut off their lifeline.
#### 1️⃣ Manual Removal (The Early-Stage Hero) 👨🍳 Best for: Small patches or newly spotted vines. ⏰ Time needed: 10–30 minutes (depending on spread).
- Step 1: Wear gloves—those tiny hooks are not fun to deal with. - Step 2: Grab the vine as close to the base as possible (where it meets the host plant) and pull firmly.
If it snaps, don’t panic—just keep tugging until the entire rootlet comes out. - Step 3: Inspect the host plant for leftover tendrils. Use a damp cloth or your fingers to wipe away any stubborn bits. - Step 4: Dispose of the vines properly—do not compost them!
Seal them in a bag and throw them in the trash (or burn them if possible). These seeds can survive for years in soil or compost.
💡 Pro Tip: If the vine is deeply embedded, use scissors or pruning shears to snip it at the base. Just be careful not to damage your host plant!
#### 2️⃣ Solarization (The Sun-Powered Eradicator) 🌡️ Best for: Large infested areas or stubborn roots. ⏰ Time needed: 4–6 weeks (but worth it!).
Solarization uses the sun’s heat to kill seeds and roots in the soil.
Here’s how: - Step 1: Clear the area of all plant debris (including dead vines). - Step 2: Water the soil thoroughly to saturate it. - Step 3: Cover the area with clear plastic sheeting, securing the edges with rocks or soil. - Step 4: Leave it for 4–6 weeks in hot, sunny weather (ideal temps: 100°F+). - Step 5: Remove the plastic, till the soil, and plant fresh, sticker-bush-free crops.
✨ Bonus: This method also sterilizes soil and prevents future weeds!
---
Sticker bushes don’t just attack plants—they can take over entire lawns if left unchecked. Here’s how to choke them out before they spread.
#### 3️⃣ Mulching (The Natural Barrier) 🍂 Best for: Preventing regrowth in garden beds. ⏰ Time needed: 15–30 minutes (one-time setup).
- Step 1: Remove all visible vines manually (see Step 1 above). - Step 2: Apply a thick layer (3–4 inches) of organic mulch, such as: - Straw - Wood chips - Grass clippings - Leaves - Step 3: Keep the mulch consistently moist (but not soggy) for at least 2–3 months.
This deprives seeds of sunlight and prevents germination.
💡 Pro Tip: Avoid fresh wood mulch if you’ve had sticker bushes before—some types can harbor dormant seeds. Composted mulch is safer.
#### 4️⃣ Vinegar or Salt Spray (The Chemical-Free Burn) 🔪 Best for: Small, localized infestations in cracks or hard-to-reach spots. ⏰ Time needed: 10 minutes (plus drying time).
Option A: Vinegar Solution (Non-Toxic) - Mix 1 gallon of white vinegar + 1 cup of salt + 1 tbsp dish soap (as a surfactant). - Spray directly on the vines (avoid desirable plants—vinegar kills everything!). - Reapply every 2–3 days until the vines wilt and die (usually 1–2 weeks).
Option B: Salt Solution (For Stubborn Spots) - Dissolve 1 cup of salt in 1 gallon of water. - Pour directly onto the soil where vines are emerging (avoid overwatering nearby plants). - Warning: Salt can harm soil fertility over time, so use sparingly and rinse the area after treatment.
⚠️ Caution: Both methods are not selective—test a small area first!
---
The best way to deal with sticker bushes? Stop them before they start. Here’s how to fortify your garden against future invasions.
#### 5️⃣ Break the Seed Cycle 🌱 Action Steps: - Remove all vines before they produce seeds (they look like tiny white or orange beads). - Inspect wildflowers, weeds, and even potted plants—sticker bushes love hitching rides. - Avoid planting susceptible hosts near infested areas (e.g., tomatoes, squash, melons).
#### 6️⃣ Improve Garden Hygiene 🧹 Do This: - Clean tools after use (especially pruners) with rubbing alcohol to kill any hidden seeds. - Rotate crops to prevent soil-borne seeds from germinating in the same spot. - Use row covers on young plants to block airborne seeds.
#### 7️⃣ Boost Plant Health (They Can’t Attack the Strong!) 💪 Healthy plants = less vulnerable hosts. - Water deeply but less frequently to encourage strong root systems. - Fertilize appropriately (over-fertilizing can attract pests). - Choose resistant varieties (e.g., some squash and cucumber breeds are less appealing to sticker bushes).
--- | Problem | Best Solution | Prevention Tip | |---------------------------|----------------------------------|---------------------------------------------| | Small vines on plants | Manual removal + disposal | Inspect plants weekly | | Large infested area | Solarization or mulching | Use composted mulch | | Stubborn roots in soil | Vinegar/salt spray | Test small areas first | | Lawn or garden spread | Suffocation mulch | Rotate crops yearly | | Recurring invasions | Break seed cycle + hygiene | Clean tools and avoid wild seed sources |
--- Final Thought: Sticker bushes are relentless, but with consistent action, you can reclaim your garden—naturally and effectively. Start with manual removal, then smother or solarize the soil, and prevent future outbreaks with smart gardening habits. Your plants (and your sanity) will thank you! 🌿🎉
Frequently asked questions
Why do sticker bushes keep coming back even after I remove them?
These tough plants have extensive root systems that can stretch 3-4 feet deep, plus they produce countless seeds that stay dormant in soil for years. Even small root fragments left behind can regrow. The key is persistence—keep removing any new shoots and use mulch or solarization to starve remaining roots.
Are there any safe herbicides for sticker bushes?
Glyphosate-based herbicides can work, but they're non-selective and may harm nearby plants. For targeted treatment, use a vinegar-salt solution (1 gallon vinegar + 1 cup salt) applied directly to leaves. Always test a small area first and avoid windy days to prevent drift. For large areas, solarization is often safer and more effective.
How do I protect myself when removing these spiky plants?
Wear thick gloves, long sleeves, and closed-toe shoes—those thorns are sharp! Use long-handled tools to avoid direct contact. For stubborn bushes, consider wearing protective eyewear too. Work when plants are dry to minimize sap that can irritate skin. Always clean tools afterward to prevent spreading seeds.
Will sticker bushes spread to my neighbors' yards?
These plants spread through seeds carried by wind, birds, and even on shoes or tools. The fruits attract wildlife that then deposits seeds elsewhere. Be proactive by removing all plants before they produce seeds, and consider discussing a neighborhood cleanup effort if infestations are widespread in your area.
How long does it really take to completely eliminate sticker bushes?
For small patches, you might see results in 2-4 weeks with consistent removal. Large infestations can take 3-6 months or longer, especially if roots are deep. The key is patience—check weekly for new growth and treat any sprouts immediately. Solarization takes 4-6 weeks but provides long-term prevention. Persistence pays off!