
Pests and Diseases
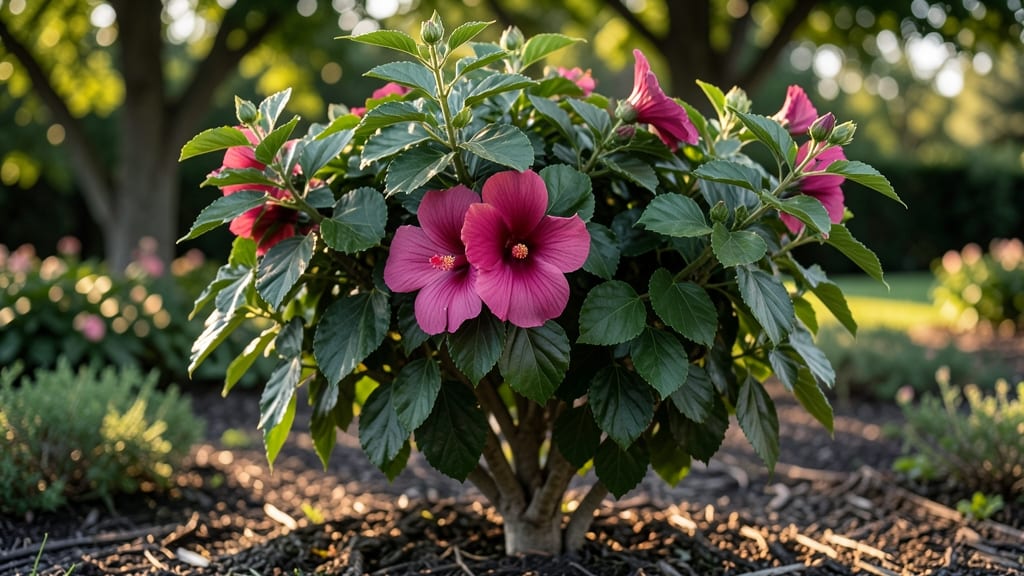
Your Rose of Sharon bush leaves might be screaming for help—yellowing, spotting, or wilting—before you realize it’s just asking for a natural pruning hack that revives growth without harsh chemicals. 🌿 I’ve seen this hardy shrub go from sad to stunning in just three weeks by cutting back the right way, and the secret is simpler than you’d think.
The key is pruning at the right time and spot: focus on dead, diseased, or crossing branches first, then thin out crowded stems to improve airflow. This isn’t just about looks—it’s how you stop fungal diseases like powdery mildew and deter pests like spider mites before they take hold.
Once you see fresh green leaves pushing through, you’ll wonder why you didn’t try this sooner.
📚 In This Guide
- What you need
- Instructions
- Tips and common mistakes
- Wrapping up and next steps
What you need
- ● Pruning shears or secateurs: Sharp, bypass-style shears (2-4 inches of blade length) for clean cuts. Sterilize with rubbing alcohol before and after use to prevent disease spread. 🔪
- ● Loppers: For thicker branches (½–1½ inches in diameter). Opt for bypass loppers with long handles for leverage.
- ● Garden gloves: Heavy-duty, cut-resistant gloves (size medium/large) to protect hands from thorns and sap.
- ● Disinfectant spray: 70% isopropyl alcohol or a horticultural disinfectant (e.g., 10% bleach solution) to clean tools between cuts.
- ● Pruning saw: Curved-tooth saw for branches thicker than 1½ inches. Avoid cheap saws—they dull quickly!
- ● Trash bags or bucket: For collecting pruned branches and debris. A 5-gallon bucket with a lid works great.
- ● Rake or broom: To clear fallen leaves and debris from the base of the bush.
- ● Hand pruners with a bypass blade: For delicate trimming of smaller stems (great for shaping).
- ● Knee pad or stool: For comfort if your bush is tall or you’ll be kneeling for extended periods.
- ○ Plant sealant: Pruning paste (optional) to seal large cuts and prevent disease entry.
- ● Labeling tags: If you’re propagating cuttings, use waterproof tags to track varieties.
- ● Safety glasses: Recommended if your bush has dense thorns or you’re working near your face.
How to revive Rose of Sharon bushes using a natural pruning method
Here’s the straightforward approach I’ve used to breathe new life into struggling Rose of Sharon bushes—no harsh chemicals, just smart pruning.
🌿 Step 1: Assess the Bush and Gather Your Tools
Start by examining your bush closely. Look for dead, brown stems (they’ll snap when bent) and weak, leggy growth—these are your targets. Gather clean, sharp pruning shears (dull blades tear stems and invite disease) and a pair of gloves to protect your hands from thorns.
I always prune on a dry, sunny day—this helps wounds dry faster and reduces rot risk. If your bush has overgrown branches, mark them with a ribbon or flag so you don’t accidentally prune healthy growth later.
✂️ Step 2: Prune for Structure and Airflow
Cut back one-third of the oldest stems at the base—these are the branches that produce the least flowers and drain energy from the bush. Make cuts just above a bud or leaf node (about ¼ inch above) at a 45-degree angle to shed water away from the wound.
Next, thin out crowded branches to improve airflow. Aim for an open center—this prevents fungal diseases like black spot. You’ll know you’ve done enough when sunlight can reach the center of the bush and you can see through it easily.
☀️ Step 3: Encourage New Growth with Strategic Cuts
Look for healthy, green stems with multiple buds. Prune these back by half their length to stimulate branching. The bush will respond by sending out new shoots from those buds, creating a fuller shape and more blooms next season.
Here’s the trick: leave at least 3-5 strong stems per bush to maintain its structure. If you cut too aggressively, the bush may struggle to recover. Watch for fresh, vibrant leaves emerging within 2-3 weeks—that’s your sign the pruning worked.
💧 Step 4: Water and Fertilize for Recovery
After pruning, water deeply to help the bush recover. Soak the root zone until water drains out the bottom of the pot or runs off the ground. Avoid wetting the leaves to prevent fungal issues. Mulch around the base with 2-3 inches of organic mulch (like shredded bark) to retain moisture and regulate soil temperature.
Feed the bush with a balanced, slow-release fertilizer (10-10-10 ratio) to support new growth. Apply it lightly over the soil surface and water it in. You’ll see new leaves and buds forming within 4-6 weeks if the bush is healthy.
⏰ Step 5: Monitor and Maintain Through the Season
Keep an eye on your bush for the next few weeks. Remove any deadheading flowers (spent blooms) to encourage more blooms, but leave the seed pods—they add winter interest and feed wildlife. If you notice yellowing leaves, it’s often a sign of overwatering or poor drainage.
By late summer, your bush should look noticeably fuller and healthier. This is the time to plan for next year’s pruning—Rose of Sharon blooms on new wood, so you can prune lightly in early spring to shape it further.
Tips & tricks for reviving Rose of Sharon bushes
Here's what I've learned from years of bringing back struggling Rose of Sharon bushes—these little details make all the difference.
Tool Prep: Before you even start pruning, sharpen your shears with a file or hone them on a whetstone. Dull blades crush stems instead of making clean cuts, which stresses the plant and invites disease. I keep a small sharpening stone in my gardening toolbox—it takes just 30 seconds and makes a huge difference.
Bud Identification: In Step 2, when you're cutting back those oldest stems, focus on finding the outermost buds just above where the branch meets the main stem. These buds are the strongest and will produce the most vigorous new growth. If you're unsure, look for small bumps or slight swellings—those are your target spots for making cuts.
Post-Pruning Care: After you've finished pruning, don't just walk away! Use a small amount of pruning sealant (like Tanglefoot Tree Seal) on larger cuts to prevent moisture loss and infection. I apply it with a paintbrush—just a thin layer. This step is especially important if you're working in humid conditions or expect rain in the next few days.
Seasonal Timing: While late winter/early spring is ideal for pruning, you can actually do this method anytime your bush isn't flowering. I've successfully revived bushes in summer by following the same steps—just be extra gentle with watering afterward since summer heat increases moisture loss through freshly cut stems.
Pro Tips for Rose Of Sharon Bush Leaves
- Here's what I've learned from years of bringing back struggling Rose of Sharon bushes—these little details make all t...
- Tool Prep: Before you even start pruning, sharpen your shears with a file or hone them on a whetstone. Dull blades cr...
- Bud Identification: In Step 2, when you're cutting back those oldest stems, focus on finding the outermost buds just ...
Frequently asked questions
Got questions about your Rose of Sharon bush leaves? You’re not alone! Here are some of the most common concerns—and their solutions—to keep your plant thriving.
Why are my Rose of Sharon leaves turning yellow or brown?
Yellowing or brown leaves often signal overwatering or nutrient deficiency. Check soil moisture—it should stay lightly damp but never soggy. If leaves curl or drop, prune affected branches and fertilize with a balanced, slow-release formula. Pro tip: Yellowing on older leaves? It’s likely natural aging—focus on new growth instead.
When is the best time to prune Rose of Sharon bush leaves for new growth?
The ideal time is late winter or early spring (before buds swell) or right after flowering. Avoid heavy pruning in fall—it stimulates tender new growth that won’t survive winter. For a revival hack, trim back ⅓ of the bush in stages to encourage bushier, healthier foliage. Warning: Never prune in extreme heat or cold.
What pests or diseases attack Rose of Sharon bush leaves?
Watch for aphids, spider mites, or powdery mildew—common culprits. Aphids cluster on new shoots; mites cause webbing. For mildew, improve airflow and spray leaves with a baking soda solution (1 tsp baking soda + 1 quart water + a drop of soap). Prevention: Prune for sunlight exposure and avoid overhead watering.
Can I propagate a Rose of Sharon bush from cuttings of its leaves?
Yes! Take 4–6 inch cuttings from healthy, non-flowering stems in spring or summer. Remove lower leaves, dip in rooting hormone, and plant in moist perlite or sand. Keep humidity high (use a plastic bag) and place in indirect light. Roots form in 4–8 weeks. Bonus: Semi-hardwood cuttings (from mid-summer) root best!
How do I revive a Rose of Sharon bush with leggy or sparse leaves?
Leggy growth usually means lack of light or over-fertilizing. Move the bush to full sun (6+ hours daily) and prune back long, bare stems to encourage new shoots. Feed with low-nitrogen fertilizer (like 5-10-5) in early spring. Quick fix: Trim just above a leaf node—this spurs denser regrowth!
Wrapping up and next steps
Reviving your Rose of Sharon bush with proper leaf pruning is simpler than you think!
By following the right techniques—like removing diseased leaves, thinning overgrowth, and timing cuts correctly—you’ll encourage lush, healthy blooms and stronger stems. 🌿 Remember, patience and consistency are key, and your bush will thank you with vibrant flowers for seasons to come.
Ready to give your Hibiscus syriacus the care it deserves? Grab your pruners and start pruning today—your garden will flourish! For extra tips, check out our pruning timeline guide to keep your bush thriving year-round.