
Pruning
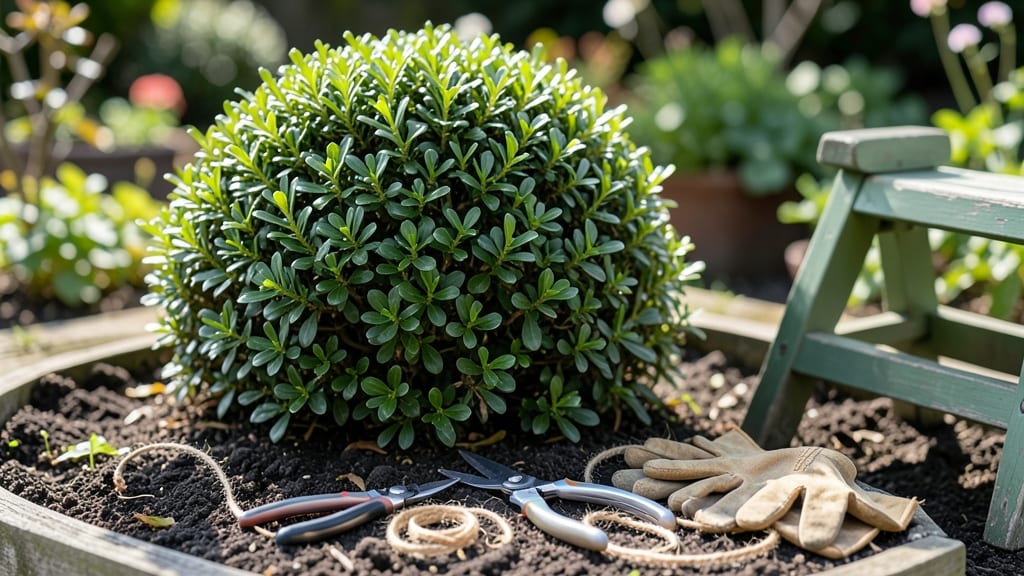
My first attempt at topiary looked like a sad, lopsided cloud—until I learned the secret to pruning bushes into shapes that stay perfect all year. ✂️ The key isn’t just cutting; it’s understanding growth patterns, timing, and the right tools to sculpt plants like boxwood, yew, or privet into living art.
Start with the basics: sharp bypass pruners, a sturdy ladder, and a vision for your shape—whether it’s a classic spiral, geometric cube, or whimsical animal. The best time to shape most bushes is late winter or early spring, when they’re just waking up but before new growth explodes.
This gives you clean lines and lets the plant heal quickly. With practice, your cuts will look intentional, not hacked. The goal is smooth curves and sharp angles that hold up through rain, wind, and seasonal changes.
I’ve turned my front yard into a gallery of green sculptures, and you can too—just start small and refine as you go. Common mistakes? Over-pruning, uneven cuts, or ignoring growth direction. But once you master the rhythm—trim, shape, repeat—your bushes will reward you with flawless forms that neighbors will envy.
Let’s get those shears ready!
📚 In This Guide
- What you need
- Instructions
- Tips and common mistakes
- Wrapping up and next steps
What you need
- ● Hand pruners (bypass pruners) – Sharp, high-quality pruners (e.g., Felco or Fiskars) for clean cuts on small to medium branches.
- ● Hedge shears – Long-handled, sturdy shears (e.g., Corona or Gardena) for larger bushes or thick foliage.
- ● Loppers – For thicker branches (1.5"–2" cutting capacity).
- ● Gloves – Heavy-duty, cut-resistant gloves (e.g., Mechanix or garden-specific) to protect your hands.
- ● Knee pads or a small stool – For comfort during prolonged shaping.
- ○ Twine or wire (optional for armatures) – For structural support in intricate designs (e.g., spiral topiary).
- ● Water spray bottle – To mist foliage and reduce dust while cutting.
- ● Topiary wire or framework – For complex shapes (e.g., animal forms or geometric designs).
- ● Stakes and ties – To secure young plants while shaping.
- ● String or chalk – For marking guidelines before cutting.
- ● Disinfectant spray – To clean tools and prevent disease spread.
- ● Safety glasses – For protection when working with thorny plants.
Step-by-step instructions for pruning bushes into shapes
Here's how to transform your bushes into stunning topiary masterpieces with precision cuts and patient shaping.
🪴 Step 1: Choose the Right Tools and Timing
Start with sharp bypass pruners for clean cuts and a hand pruner for smaller branches. I always disinfect my tools with rubbing alcohol between cuts to prevent disease spread. The best time to shape is late winter or early spring before new growth begins—this ensures you're working with fresh, pliable branches.
If you're shaping evergreens like boxwood or yew, you can prune lightly throughout the growing season to maintain form. But for deciduous bushes, wait until after they've leafed out so you can see the structure clearly. Avoid pruning in extreme heat or cold—60-70°F is ideal for both the plant and your comfort.
✂️ Step 2: Establish Your Base Shape
Begin by removing any dead, diseased, or crossing branches—these are your first priorities. For formal shapes like spheres or cones, I start by identifying the central leader (the main upright stem) and prune competing branches back to their origin. Use a level or string line to create straight edges—this is your guide for symmetry.
Make your first cuts just above a leaf node (the bump where leaves attach) at a 45-degree angle to prevent water from pooling. For a globe shape, cut outward-facing branches shorter than inward ones to create that perfect rounded silhouette. Step back frequently to check your progress—your eye will catch asymmetries before they become permanent.
🌿 Step 3: Refine the Details with Layered Cuts
Now for the fun part: shaping! For a tapered form, gradually shorten branches as you move upward, creating a natural funnel shape. Use your pruners to trim 1-2 inches at a time, then step back to assess. I like to work in three layers: outer, middle, and inner, refining each before moving inward.
For intricate designs like spirals or geometric patterns, use wire supports temporarily to train branches into place. Secure with soft plant ties, but check weekly to avoid girdling. Water thoroughly after pruning—1-2 gallons per bush—to help the plant recover. You'll see new growth fill in within 4-6 weeks, so don't rush the final touches.
☀️ Step 4: Maintain and Perfect Through the Season
After the initial shaping, monitor your bushes weekly. Use hedge shears for touch-ups, trimming just the tips to encourage bushier growth. For evergreens, a light pruning every 4-6 weeks keeps the shape crisp. I always prune after morning dew has dried to reduce fungal risks—wet tools and leaves create the perfect conditions for disease.
Here's the thing—topiary is an ongoing process. In late summer, give your bushes a final trim to prepare for winter. For delicate shapes, consider lightweight netting to protect against snow damage. By next spring, your carefully shaped bushes will be the envy of the neighborhood—perfect, year-round forms that look like they belong in a botanical garden.
Tips & tricks for perfect topiary shaping
Transforming bushes into topiary art takes patience and precision—here's how to avoid common pitfalls and achieve flawless results.
Tool Sharpness is Non-Negotiable: Dull pruners crush stems instead of making clean cuts, which can damage your plant. Test your bypass pruners by cutting a piece of paper—if it tears instead of slices cleanly, sharpen or replace them. I've ruined three perfectly good bushes because I skipped this step, so trust me when I say it matters! For intricate designs, consider adding concave pruners to your toolkit—they create smooth curves that regular pruners can't match.
The 45-Degree Angle Secret: Making cuts at a precise 45-degree angle above the leaf node isn't just about aesthetics—it prevents water from pooling in the wound, which reduces disease risk. Use a small notched ruler or even a business card as a guide if you're struggling with the angle. For globe shapes, I mark the angle with a pencil on my pruners so I don't have to think about it while working.
Layered Approach for Clean Lines: When refining details in Step 3, work from the outside in using your three-layer method. Start with the outermost branches, then move inward—this prevents you from accidentally cutting branches you've already shaped. I like to use a string line tied between two stakes as a visual guide for straight edges. For tapered forms, imagine the shape as a series of horizontal slices, gradually shortening each layer by about 20% from the previous one.
Post-Pruning Recovery Tip: After your initial shaping, give each bush 1-2 gallons of water right away to help it recover. I've found that adding a seaweed fertilizer to the water (optional) boosts healing and encourages new growth. Avoid heavy watering for the first week after pruning—just keep the soil lightly moist. You'll notice new growth filling in within 4-6 weeks, which is when you can start refining those final details.
Pro Tips for Pruning Bushes Into Shapes
- Transforming bushes into topiary art takes patience and precision—here's how to avoid common pitfalls and achieve fla...
- Tool Sharpness is Non-Negotiable: Dull pruners crush stems instead of making clean cuts, which can damage your plant....
- The 45-Degree Angle Secret: Making cuts at a precise 45-degree angle above the leaf node isn't just about aesthetics—...
Frequently asked questions
Got questions about transforming your bushes into stunning topiary shapes? Here are answers to the most common ones—so you can prune with confidence!
When is the best time to prune bushes into shapes?
The ideal time depends on your plant, but early spring (just as new growth begins) is best for most bushes. For evergreens like boxwood or yew, prune lightly in late spring or early summer to encourage dense growth. Avoid heavy pruning in fall—it can stress plants before winter. Pro tip: If shaping a young bush, start small to avoid over-pruning!
What tools do I need for precise shaping?
You’ll need:
- Hand pruners for small cuts and details.
- Hedge shears for larger, smoother surfaces.
- Topiary shears (with adjustable blades) for intricate designs.
- A level or string guide to keep lines straight.
- Gloves and knee pads for comfort and protection.
Can I prune bushes into shapes year-round?
No—timing matters! Heavy pruning in winter can leave plants vulnerable to cold damage, while pruning in late summer or fall may stimulate tender new growth that won’t harden off before frost. Stick to spring or early summer for best results. Exception: Light trimming to maintain shape is fine anytime, but avoid radical changes.
What if my bush looks messy after pruning?
Don’t panic! Uneven cuts happen—here’s how to fix it:
- Step back often to check proportions.
- Use a string line as a guide for straight edges.
- Fill in gaps with smaller, frequent cuts over time.
- For stubborn spots, prune in layers (thin out first, then refine).
What are some easy beginner-friendly shapes to start with?
Start simple! Try these low-maintenance shapes:
- Sphere or globe – Classic and forgiving.
- Cube or rectangular hedge – Great for formal gardens.
- Spiral or cone – Adds vertical interest.
- Animal silhouettes (e.g., bunny, bird) – Fun and creative!
Wrapping up and next steps
Pruning bushes into shapes isn’t just about skill—it’s about patience, creativity, and a little green-thumb love! 🌿 With the right tools, techniques, and timing, you can transform your yard into a living masterpiece that delights year-round.
Whether you’re shaping a formal hedge or a whimsical topiary, remember: every snip is a step toward beauty.
Ready to take the plunge? Start small—pick one bush and practice your cuts. Soon, you’ll be crafting stunning, structured shapes that make your outdoor space truly one-of-a-kind. Happy pruning!