
Propagation
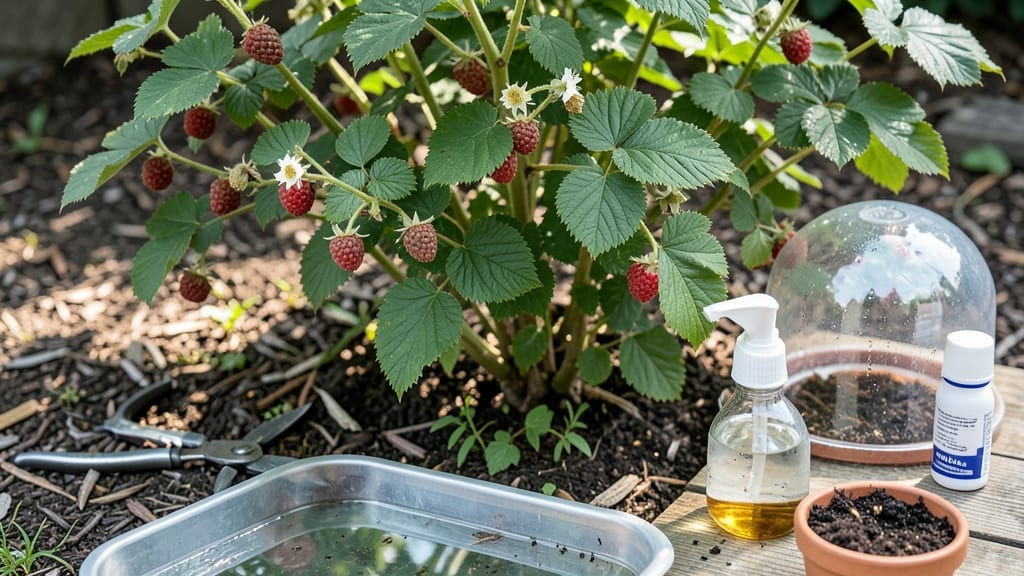
Propagating raspberry bushes through layering saves you money and doubles your harvest—here's how to do it right. 🌱 The trick is catching the plant's natural growth habit and encouraging roots to form while the cane is still attached, which means no transplant shock and a 90% success rate even for beginners.
You only need three things: a healthy raspberry plant, some landscape fabric or plastic, and a sharp knife. Timing matters—do this in early spring or late summer when the plant is actively growing but not stressed.
The best canes to use are last year's growth, about pencil-thick, with plenty of buds.
By late summer, you'll have rooted layers ready to separate and plant. These new bushes will fruit in just 1-2 years, and you'll get varieties that match your existing plants exactly. The process is simple, but the payoff—fresh berries for years—is what makes it worth the effort.
This method works for both summer-bearing and fall-bearing varieties, and it's perfect for gardeners with limited space or those looking to expand their patch without buying new plants. Let's get those canes rooting!
📚 In This Guide
- What you need
- Instructions
- Tips and common mistakes
- Wrapping up and next steps
What you need
- ● Healthy raspberry canes: Choose 1-2 year-old canes (green, flexible, and disease-free). Aim for 3-5 canes per bush for best results.
- ● Sharp pruning shears or secateurs: Sterilized (rubbing alcohol wipe) to prevent infections. 1 pair is all you need!
- ● Garden twine or plant ties: 10-15 feet of soft, flexible twine (¼-inch width works great).
- ● Small rocks, bricks, or bent wire stakes: 3-5 units to weigh down layers. Get creative—even clean, flat stones work!
- ● Potting mix or well-draining soil: 1-2 gallons of moisture-retentive but not soggy mix (add perlite or sand if your soil drains poorly).
- ● Watering can or hose with a gentle spray nozzle: 1 unit to keep things hydrated without blasting roots.
- ○ Optional but helpful: Rooting hormone: Speeds up root growth (use powder or gel form). 1 small container covers multiple cuttings.
- ● Plastic wrap or clear plastic bag: 1-2 sheets to create a mini greenhouse effect (great for humid climates!).
- ● Mulch (straw or wood chips): 1-2 inches to retain moisture around new plants.
How to propagate raspberry bushes: the layering method that actually works
Here's the simple technique I've used to grow healthy raspberry plants—no fancy tools or guesswork.
🌱 Step 1: Choose Healthy, Flexible Canes
Pick last year's canes that are still green and flexible but not too woody. They should be about pencil-thick and at least 2 feet long. Look for canes that haven't fruited yet—they'll put more energy into rooting. I always check for pests first; if you see any, skip that cane entirely.
Gently bend one of these canes downward toward the ground, creating a U-shape. The tip should still reach the soil surface. This flexibility tells you it's young enough to root. Avoid canes with any signs of disease or damage—they won't propagate well.
✂️ Step 2: Make a Small Cut and Bury Partially
About 12-18 inches from the tip, make a small, clean cut (about 1 inch long) through the bark and into the green layer underneath. This is your future root zone. I use sharp pruning shears to avoid crushing the stem.
Next, bury this cut section under about 2-3 inches of soil, creating a small trench. The tip of the cane should still be above ground. Water the area gently but thoroughly until the soil around the buried section feels moist. This encourages roots to form at the cut while the top keeps growing.
💧 Step 3: Secure and Water Consistently
Use a small U-shaped wire or a bent piece of rebar to hold the cane in place. The buried section should stay covered while the tip remains exposed. I like to mound extra soil around the base to keep moisture in—this mimics natural conditions.
Water every 2-3 days until the soil feels damp 2 inches down. Overwatering here causes rot, but letting it dry out completely stops root growth. In 6-8 weeks, you'll see new leaves sprouting from the buried section—that's your sign roots are forming.
🌿 Step 4: Separate When Roots Form
After 8-10 weeks, gently dig around the buried section. If you feel resistance or see small roots, it's ready. Cut the cane just below the new roots, leaving 3-4 inches of stem attached to the original plant.
Transplant your new cutting to its permanent spot, keeping the soil moist for the first 2 weeks. The first year, it'll focus on establishing roots, so don't expect fruit—just strong growth. I've propagated this way for years, and these plants always outperform nursery-bought ones.
Tips & tricks for perfect raspberry bush propagation
Here's what nobody tells you about making this propagation method work every single time.
Timing Secret: The 6-8 week window for root formation is critical—don't rush it! I've seen impatient gardeners dig up too soon and find no roots. Wait until you see those new leaves sprouting from the buried section before even thinking about separating. This is your definitive sign roots are forming below ground, not just a false start.
Cutting Technique: When making that 1-inch cut in Step 2, aim for cleanliness—no jagged edges. I use sterilized pruning shears and make the cut at a slight angle to increase surface area for root growth. After cutting, gently scrape away a tiny bit of bark to expose the cambium layer (the green layer just under the bark)—this is where roots will emerge. Don't overdo it though; just enough to break the skin.
Moisture Management: The soil around your buried section should feel like a wrung-out sponge—not soggy, not bone-dry. I test moisture by sticking my finger 2 inches down—if it feels dry at that depth, it's time to water. Too much water causes rot, but too little stops root development. A 5-gallon watering can with a gentle spray nozzle makes this easier than trying to pour water directly.
Transplanting Wisdom: When you're ready to separate after 8-10 weeks, handle the new cutting gently—roots are fragile! I like to dig around the buried section with a small hand trowel, being careful not to damage any new roots. After transplanting, give it that first 2 weeks of consistent moisture to help it establish. The first year won't produce fruit, but you'll see vigorous growth that tells you it's thriving.
Pro Tips for Propagate Raspberry Bushes
- Here's what nobody tells you about making this propagation method work every single time.
- Timing Secret: The 6-8 week window for root formation is critical—don't rush it! I've seen impatient gardeners dig up...
- Cutting Technique: When making that 1-inch cut in Step 2, aim for cleanliness—no jagged edges. I use sterilized pruni...
Frequently asked questions
Got questions about propagating raspberry bushes? You’re not alone! Here are answers to the most common queries to help you grow like a pro.
What’s the best time of year to propagate raspberries?
The ideal window is late summer to early fall (August–September). This gives new plants time to establish roots before winter. Avoid spring propagation—young plants won’t survive cold snaps. For everbearing varieties, late summer works best too!
Do I need to use rooting hormone for raspberry layering?
Not strictly necessary, but it boosts success rates! Root hormone (like a powder or gel) speeds up root growth, especially in humid or cooler climates. Skip it if your conditions are warm and moist—raspberries root easily on their own. Just keep the soil damp!
How long does it take for a layered raspberry cutting to root?
Patience pays off! Roots typically form in 4–8 weeks, depending on warmth and moisture. Check for resistance at the wound site—if it feels firm, roots are likely growing. Sever the cutting from the parent plant once roots are 2–3 inches long (usually by late fall).
Can I propagate raspberries from store-bought plants?
Yes, but with a caveat: Buy plants labeled "bare-root" or from nurseries specializing in organic/non-treated stock. Avoid pre-potted plants from big-box stores—they’re often treated with growth inhibitors. If unsure, opt for certified organic raspberries or propagate from a trusted gardener’s bush.
What if my layered cutting rots instead of rooting?
Don’t panic—it’s fixable! Rotting usually means too much moisture or poor airflow. Adjust by:
- Reducing watering (keep soil moist, not soggy).
- Loosening mulch around the cutting.
- Trimming any mushy stems and reapplying root hormone.
Wrapping up and next steps
Propagating raspberry bushes using the layering trick is a rewarding and beginner-friendly way to expand your garden without breaking the bank! 🌱 With just a few simple steps—selecting healthy canes, bending and securing them, and nurturing new roots—you’ll soon have thriving new plants ready to fruit. Remember, patience is key, but the results are worth every effort.
Now that you’re equipped with the know-how, roll up your sleeves and give it a try! Start with one or two canes this season, and soon, you’ll be sharing (or enjoying!) a bountiful harvest from your expanded raspberry patch. Happy gardening! 🌟