
Size
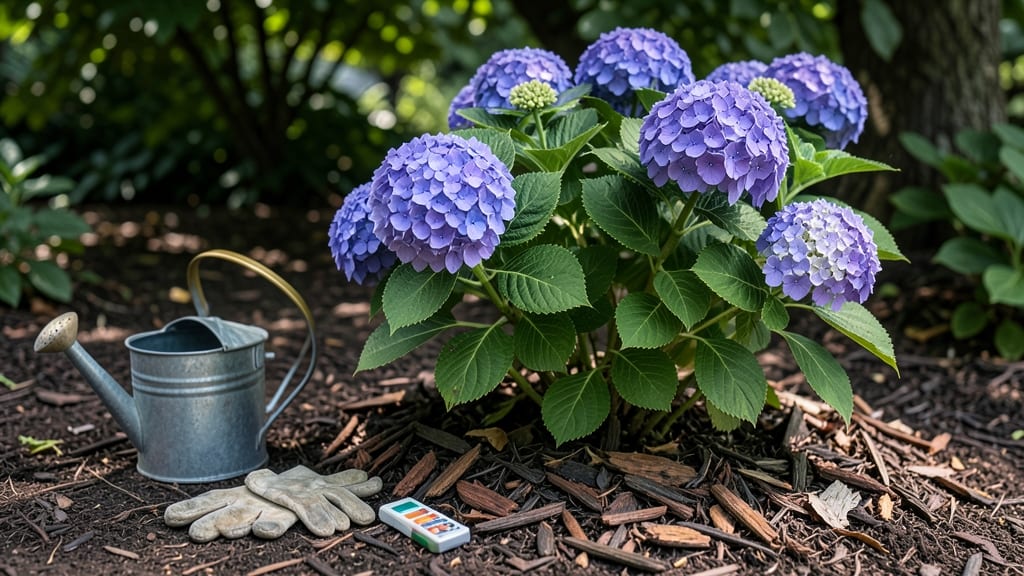
Growing a hydrangea bush starts with the right spot and soil—morning sun and afternoon shade unlock those signature blooms. 🌸 I remember my first hydrangea struggling in full sun until I moved it to a dappled spot where it thrived, producing clusters big enough to fill a vase.
The secret isn’t just sunlight; it’s the balance of moisture, nutrients, and knowing when to prune for next year’s flowers.
You’ll need well-draining soil rich in organic matter (think compost or aged manure) and a location that gets at least 6 hours of sunlight daily. Hydrangeas love moisture but hate soggy roots, so mulch around the base to retain humidity and protect roots from extreme temperatures.
Varieties like ‘Endless Summer’ or ‘Nikko Blue’ are beginner-friendly, blooming reliably with minimal fuss.
By summer, you’ll see those iconic blooms—some pink, some blue—depending on your soil’s pH. Acidic soil turns them blue, while alkaline leans them pink.
Prune in late winter or early spring to shape the bush and encourage new growth, but never cut back old wood unless you’re growing a variety that blooms on new wood.
This method works for both container and in-ground planting, making it adaptable to any garden size. The key is patience—hydrangeas reward consistent care with vibrant, long-lasting blooms that brighten the garden from mid-summer through fall.
📚 In This Guide
- What you need
- Instructions
- Tips and common mistakes
- Wrapping up and next steps
What you need
- ● Hydrangea plant: Choose between mophead, lacecap, or panicle varieties (deciduous or evergreen). Buy a 3-5 gallon container plant or a bare-root plant for spring planting.
- ● Well-draining potting mix or garden soil: 50 lbs of high-quality peat-based or compost-rich soil (pH 5.2–6.5 for blue/purple blooms; 6.0–7.0 for pink/red). Add 2–3 lbs of sulfur for acidic soil needs.
- ● Fertilizer: Balanced granular fertilizer (10-10-10 or 20-20-20): 1 lb per 10 sq ft of planting area.
- ● Slow-release organic fertilizer (e.g., composted manure or bone meal): 1–2 lbs mixed into soil at planting.
- ○ Aluminum sulfate (for blue blooms): 1–2 tbsp per gallon of water (optional, apply monthly during bloom season).
- ● Mulch: 2–3 inches of pine bark, wood chips, or shredded leaves to retain moisture and regulate soil temp.
- ● Pruning tools: Bypass pruners: For clean cuts on stems.
- ○ Loppers: For thicker branches (optional, if bush is large).
- ● Disinfectant (rubbing alcohol or bleach solution): To sterilize tools between cuts.
- ● Watering supplies: Hose with adjustable nozzle or watering can: For deep, even watering.
- ○ Drip irrigation kit (optional): For consistent moisture in hot climates.
- ● Soil pH test kit: To monitor acidity levels and adjust as needed.
- ● Epsom salt (magnesium sulfate): 1 tbsp per gallon of water (boosts green foliage and bloom size).
- ● Plant supports (stakes or cages): For heavy-headed varieties like mophead hydrangeas.
- ● Frost cloth: For young plants in colder climates (Zone 5 or below).
- ● Gloves and knee pads: For comfortable planting and pruning.
Step-by-Step instructions for growing a hydrangea bush
Here's the foolproof method I use to coax those signature blooms from stubborn hydrangea cuttings.
🌱 Step 1: Choose the Right Location and Prepare the Soil
Hydrangeas thrive in partial shade—think morning sun with afternoon shade in hot climates. If your yard only offers full sun, select varieties like 'Limelight' or 'Endless Summer' that tolerate more light. Dig a hole twice as wide as the root ball but only as deep. This encourages root spread rather than settling too low.
Amend the native soil with 2-3 inches of compost mixed into the bottom and sides of the hole. Hydrangeas love acidic soil (pH 5.5-6.2) for vibrant blooms. Test your soil—if it's alkaline, add sulfur or peat moss to lower the pH before planting. The roots will thank you with better nutrient uptake and fewer yellow leaves.
☀️ Step 2: Plant at the Correct Depth and Water Thoroughly
Position the hydrangea so the top of the root ball sits 1 inch below soil level. This prevents stem rot from sitting too low while encouraging strong root growth. Backfill with native soil mixed with compost, pressing gently to remove air pockets but not compacting tightly.
Water immediately after planting with 1 gallon of water per plant—enough to settle the soil and eliminate air gaps. Hydrangeas hate dry roots, so mulch around the base with 2-3 inches of organic mulch, leaving a 2-inch gap around the stem to prevent rot. Check soil moisture weekly; it should feel like a damp sponge, not soggy or bone-dry.
💧 Step 3: Maintain Consistent Moisture and Fertilize Seasonally
Water deeply 2-3 times per week during the first growing season, aiming for 1-1.5 inches of water per week. Let the top 2 inches of soil dry between waterings to prevent root rot. In containers, water daily in summer heat—hydrangeas in pots dry out faster than in-ground plants.
Feed with a balanced fertilizer (10-10-10) in early spring and again after flowering. For blue blooms, add aluminum sulfate (1 tablespoon per gallon of water) monthly during summer. Pink flowers? Skip the aluminum—your soil's natural pH will dictate the color. Prune spent blooms in late summer to encourage next year's buds.
✂️ Step 4: Prune for Shape and Health in Late Winter
Prune hydrangeas after the last frost but before new growth appears. For old-wood bloomers (like 'Annabelle'), cut back 1/3 of the oldest stems to encourage new growth. For new-wood bloomers (like 'Endless Summer'), trim back last year's blooms to a strong set of leaves—this ensures summer flowers.
Never prune in fall—you'll remove next year's flower buds. Shape the bush by cutting just above a leaf node or outward-facing bud. Remove any dead, crossing, or weak stems first. After pruning, apply a 2-inch layer of mulch to protect roots from winter temperature swings and retain moisture.
⏰ Step 5: Protect and Prepare for Winter Dormancy
In zones with below 0°F winters, wrap the base of young hydrangeas with burlap or frost cloth and mound extra mulch. Established plants handle cold well, but young roots need protection. Water deeply before the first hard frost to ensure roots are hydrated through winter.
In spring, remove winter protection as soon as the ground thaws. Hydrangeas bloom on old wood, so don't fertilize until you see new growth—usually by mid-April in most climates. Watch for aphids on new shoots; blast them off with water or treat with neem oil if they persist. With consistent care, your hydrangea will reward you with 3-4 feet of lush blooms by midsummer.
Tips & tricks for growing a thriving hydrangea bush
Transforming bare cuttings into a blooming hydrangea masterpiece takes patience—but these insider tricks will give you that competitive edge in your garden.
Soil Science Matters: That 2-3 inches of compost in Step 1 isn't just filler—it's where the magic happens. For even better results, mix in 1 part peat moss to 3 parts compost before planting. This creates a perfect air-to-moisture ratio that hydrangea roots crave. I've seen plants double their bloom size just from this simple upgrade! The key is to work it into the bottom 12 inches of the hole, not just surface-level.
Watering Wisdom: The 1 gallon of water immediately after planting is non-negotiable, but here's the secret: water slowly over 10-15 minutes to let it soak deep. Shallow watering encourages shallow roots that struggle in summer heat. After that, use your finger to check moisture—2 inches down should feel like a damp sponge, not wet cement. In containers, I swear by self-watering pots with 1-2 inches of gravel at the bottom to prevent soggy roots.
Seasonal Pruning Hack: When pruning old-wood bloomers in Step 4, look for stems that are thicker than a pencil—these are your powerhouses for next year's blooms. Cut just above a leaf node (the bump where leaves grow) that faces outward. For new-wood types, trim back to the first set of strong leaves you see when looking at the stem. This simple technique prevents those awkward lopsided bushes and ensures flowers appear exactly where you want them.
Winter Protection Pro Tip: For those below 0°F winters, don't just wrap with burlap—create a mini greenhouse effect. After wrapping, mound 4-6 inches of straw over the root zone (not touching the stems) and cover with a clear plastic dome (like a large milk jug with the bottom cut off). This traps warmth while allowing airflow. I've had plants survive -15°F winters using this method—something the nursery never told me!
Pro Tips for Grow A Hydrangea Bush
- Transforming bare cuttings into a blooming hydrangea masterpiece takes patience—but these insider tricks will give yo...
- Soil Science Matters: That 2-3 inches of compost in Step 1 isn't just filler—it's where the magic happens. For even b...
- Watering Wisdom: The 1 gallon of water immediately after planting is non-negotiable, but here's the secret: water slo...
Frequently asked questions
Got questions about growing your dream hydrangea bush? You’re not alone—these beauties can be a little tricky! Here are answers to the most common concerns, from pruning puzzles to soil secrets.
How much sun does a hydrangea bush really need?
Most hydrangeas thrive in partial shade (4–6 hours of sunlight daily). Too much sun can scorch leaves, while too little may reduce blooms. Blue varieties (like H. macrophylla) prefer shade, while panicle types (like H. paniculata) tolerate more sun. Observe your bush’s leaves—if they’re crispy, it’s getting too much heat!
When is the best time to plant a hydrangea bush?
The ideal window is early spring or fall, when soil is workable but not scorching. Planting in summer can stress roots, while winter’s chill may delay growth. Pro tip: Water deeply after planting and mulch to retain moisture. If you must plant in summer, choose a cloudy day and keep the root ball moist for 2–3 weeks.
Should I prune my hydrangea now, or wait until spring?
It depends! Old wood bloomers (like H. macrophylla) should be pruned right after flowering (late summer/early fall) to avoid cutting off next year’s buds. New wood bloomers (like H. paniculata) can be pruned in late winter/early spring. Never prune in fall if your bush blooms on old wood—you’ll sacrifice next season’s flowers!
Why are my hydrangea leaves turning yellow?
Yellow leaves usually signal overwatering, poor drainage, or nutrient deficiency. Check the soil—it should feel moist but not soggy. If the yellowing starts at the edges, it’s often chlorosis (iron deficiency), common in alkaline soil. Try adding chelated iron or sulfur to lower pH. Pro tip: Hydrangeas hate “wet feet”—ensure pots or garden beds drain well!
Can I grow hydrangeas in pots, or do they need a garden bed?
Container gardening works
for hydrangeas, especially smaller varieties like H. macrophylla ‘Endless Summer’. Use a large pot (15+ gallons) with drainage holes and a well-draining potting mix. Move pots to partial shade in summer and water daily (containers dry out faster). Just remember: Potted hydrangeas may need more frequent fertilizing than in-ground plants.
Wrapping up and next steps
Growing a stunning hydrangea bush is all about patience, the right conditions, and a little love! 🌸 With the perfect balance of sunlight, well-draining soil, and seasonal care, you’ll be rewarded with vibrant blooms that brighten up any garden.
Don’t forget to prune at the right time and protect your plant from harsh winters—your efforts will pay off in spectacular color!
Ready to watch your hydrangea thrive? Start small—pick a sunny spot, prep the soil, and plant with confidence. Then, enjoy the journey as your bush grows into a breathtaking centerpiece! 🌿✨