
Pruning
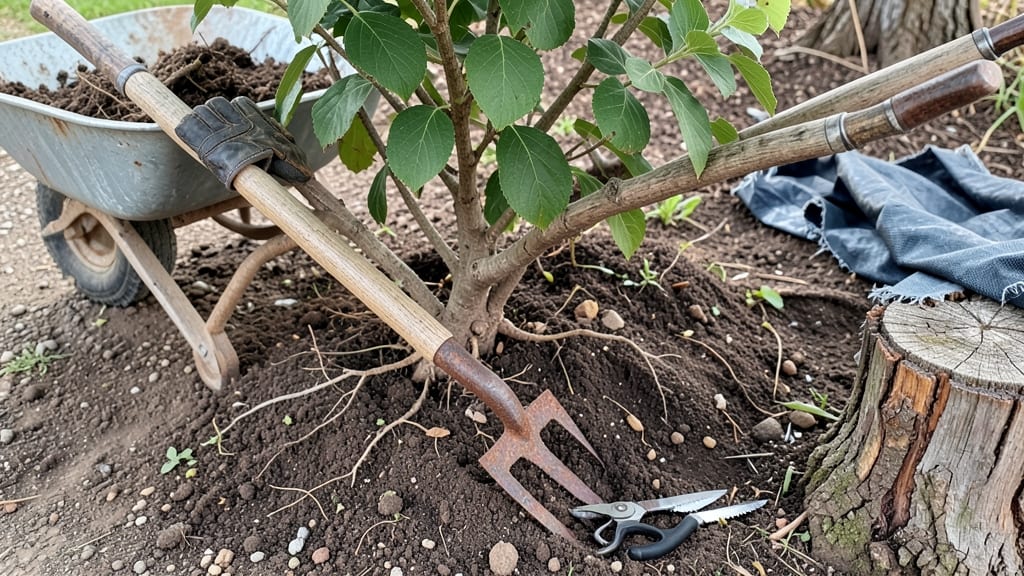
Digging out a bush without turning your garden into a war zone is easier than you think. ✂️ I’ve removed everything from overgrown lilacs to stubborn roses—here’s how to do it cleanly, so your soil stays healthy and your yard doesn’t look like a construction site afterward.
Start with the right tools: a sharp spade, pruning shears, and a wheelbarrow for debris. The key is timing—dig when the soil is moist but not soggy, and prune back any thick branches first to make the bush lighter.
A 2-foot-deep trench around the base loosens roots before you even lift, cutting down on struggle. Once it’s out, you’ll have a hole ready for a new plant or just clean soil.
The roots break down faster than you’d expect, and with a little effort, you’ll avoid the messy, half-buried stumps that ruin the look. Even stubborn bushes come out cleaner than you’d imagine with this method.
For large bushes, rent a transplant spade or ask a friend to help—teamwork makes the job faster. And if you’re replanting, add some compost to the hole to give your new addition a head start. Your garden will thank you for the care.
📚 In This Guide
- What you need
- Instructions
- Tips and common mistakes
- Wrapping up and next steps
What you need
- ● Pruning shears or loppers: Sharp, bypass-style shears (for clean cuts) or loppers (for thicker branches). Size: 6-8” blades for shears; 20-24” for loppers.
- ● Garden spade or digging fork: A sturdy flat-blade spade (for slicing roots) or a digging fork (for loosening soil). Size: 10-12” blade.
- ● Garden gloves: Heavy-duty, cut-resistant gloves (thorns and roots are no joke!). Bonus: Add wrist support for extra grip.
- ● Wheelbarrow or tarp: For hauling debris. Size: At least 2-3 cubic feet capacity.
- ● Shovel (round-point or flat): For moving soil and roots. Size: 12-14” blade.
- ● Rake: A bow rake (for clearing soil) or leaf rake (for finer debris). Size: 18-24” head.
- ● Pruning saw: For thick, woody stems (if your bush has them). Size: 12-16” blade.
- ● Water hose or bucket: To rinse tools and wet soil (if digging in dry conditions).
- ● Root pruner or handsaw: For stubborn, thick roots that won’t budge.
- ● Knee pads or cushion: Because your knees will thank you after hours of digging.
- ● Garden twine or burlap: To wrap and transport large root balls.
- ● Soil amendment (compost or mulch): If you plan to replant or improve the soil.
- ● Safety glasses: Protect your eyes from flying debris (especially when using a pruning saw).
- ● Portable work light: If you’re digging in low-light conditions.
Step-by-Step instructions for digging out a bush safely
Here's how I remove bushes without breaking roots or leaving stumps behind.
🪴 Step 1: Prepare Your Workspace and Tools
Clear the area around the bush of rocks, debris, and shallow roots with a garden fork. I like to work when the soil is moist—not soggy—but damp enough to crumble easily. This is the moment that matters: dry soil will crumble into dust when you dig, while wet soil sticks to your tools and clumps.
Gather your tools: a sharp spade or digging bar, heavy-duty pruners, a wheelbarrow or tarp, and a sturdy pair of gloves. I always lay down the tarp first—it keeps the area clean and makes moving soil easier. If the bush is large, borrow a digging saw for thick roots you can't cut with pruners.
✂️ Step 2: Prune the Bush Before Digging
Cut back branches with pruners to reduce the bush's size and weight. I remove about a third of the foliage first—this makes the bush lighter and easier to handle. For thick stems, use pruners to cut at a 45-degree angle just above a leaf node. This encourages new growth later if you replant.
If the bush is overgrown, trim it in stages over a few days. You'll see the difference immediately: a smaller, more manageable plant that won't fight you when you lift it. Don't skip this step—digging a full-sized bush is backbreaking and risky for your tools.
💧 Step 3: Dig a Trench Around the Bush
Use your spade to dig a trench about 12-18 inches deep around the bush, following its natural root spread. I start about 6 inches away from the trunk and dig outward. The goal is to expose the root ball without severing it prematurely. If you hit a thick root, pause and use your digging bar to loosen it gently.
Work slowly and steadily—don't rush. You'll notice the soil will start to separate from the root ball as you go. If the bush is small, you can dig all the way around in one go. For larger bushes, dig in sections and gradually widen the trench until you can see most of the roots.
🌱 Step 4: Lift the Bush and Remove the Root Ball
Once the trench is complete, stand back and assess the root ball. If it's still attached, wiggle the bush gently while pulling upward. For stubborn roots, use your digging bar to pry underneath the root ball. I've found that rocking the bush side to side helps loosen it without breaking the roots.
If the root ball resists, stop and dig deeper—don't force it. You'll know you're ready when the bush lifts with minimal effort. Place it on your tarp or into the wheelbarrow. Avoid dragging it across the ground; this tears roots and stresses the plant. For large bushes, call for help—two people make lifting much easier.
🪴 Step 5: Clean Up and Dispose of the Bush
Once the bush is out, inspect the hole for any remaining roots or debris. Use your hands or a small trowel to remove any fragments left behind. I like to fill the hole with fresh soil or compost to prepare it for replanting. If you're not replanting, consider adding mulch to suppress weeds.
For disposal, check local regulations—some areas require permits for large plants. If you're composting, chop the bush into smaller pieces first. If you're hauling it away, secure it in your vehicle with bungee cords to prevent it from shifting. Real talk: this is the part where most people rush, but taking time here ensures your yard stays clean and safe.
Tips & tricks for damage-free bush removal
Here's what I learned the hard way after wrestling with stubborn bushes—these tricks make all the difference between a smooth removal and a frustrating mess.
Timing is Everything: The soil moisture mentioned in Step 1 is non-negotiable. I've tried digging in dry soil, and it turns to powder—your spade will just push it aside without cutting through roots. If your soil feels too dry, water the area the day before. For clay-heavy soil, work when it's slightly damp but not sticky—this prevents your tools from getting gummed up. Trust me, your back will thank you.
Pruning Strategy: When you're trimming in Step 2, focus on removing the largest branches first. I've seen people cut everything at once, only to struggle with a heavy, awkward bush. Cutting in stages also helps you gauge how much weight you're dealing with. Pro tip: If you're replanting, save those trimmed branches—they make great cuttings for new plants!
Trenching Technique: In Step 3, that 12-18 inch depth isn't just a suggestion—it's what gets you under most root systems. I once tried skipping this depth with a small bush, and ended up with half the roots still in the ground. For larger bushes, work in sections: dig one side completely, then move to the opposite side. This prevents the bush from tipping over prematurely. And if you hit a major root, don't fight it—use your digging bar to gently pry it loose rather than forcing the spade through.
Lifting Like a Pro: The wiggling technique in Step 4 works because it mimics how plants naturally move in the wind. Start with small, gentle movements—think more "rocking chair" than "earthquake." For particularly stubborn bushes, try this: after wiggling, place your spade under the root ball at a 45-degree angle and gently lever upward. Two people can make this easier, but even alone, you'll get better with practice. And remember: patience beats brute force every time.
Pro Tips for Dig Out A Bush
- Here's what I learned the hard way after wrestling with stubborn bushes—these tricks make all the difference between ...
- Timing is Everything: The soil moisture mentioned in Step 1 is non-negotiable. I've tried digging in dry soil, and it...
- Pruning Strategy: When you're trimming in Step 2, focus on removing the largest branches first. I've seen people cut ...
Frequently asked questions
about digging out a bush—because even pros need a little extra help sometimes! Here are answers to the most common queries to make your removal project smoother than a freshly mowed lawn.When is the best time of year to dig out a bush?
The ideal time is early spring or fall when the soil is moist but not frozen. Avoid summer heat or winter frost—roots are more vulnerable, and plants may be stressed. If you must remove it now, water the area 24 hours before digging to soften the soil.
What if the bush has invasive roots? How do I avoid damaging nearby plants?
Invasive roots (like those from Japanese knotweed or bamboo) require extra caution. Use a sharp spade to cut roots at least 12 inches deep and 6+ inches from the stem. For delicate plants nearby, create a barrier trench with landscape fabric or cardboard before digging.
Can I use a shovel or do I need a digging bar?
A shovel is fine for small bushes (under 3 feet tall), but a digging bar or mattock is better for woody stems or compacted soil. For stubborn roots, rent a post-hole digger or ditch witch for precision. Pro tip: Alternate between lifting and prying to avoid breaking the shovel.
What do I do with the bush once it’s out of the ground?
Options depend on the bush’s health and local rules:
- Compost: If disease-free, chop into small pieces and add to your compost pile (avoid invasive species!).
- Municipal green waste: Check local guidelines—many areas offer free disposal.
- Donate: Local nurseries or schools may repurpose roots/stems for mulch or crafts.
- Burn (carefully): Only for small, dry branches—never burn diseased or invasive plants.
What if the bush keeps regrowing after I dig it out?
Stubborn regrowth usually means root fragments were left behind. For aggressive bushes (like blackberry brambles or bindweed), treat the hole with vinegar or copper sulfate to kill remaining roots. If it’s a shrub, smother it with cardboard for 6+ months to starve out regrowth.
Bonus Tip: Label your holes!
If you’re replacing the bush later, mark the hole with stakes or spray paint to avoid digging in the same spot again. Some plants (like hydrangeas) need years to establish—give them space!
Wrapping up and next steps
Digging out a bush doesn’t have to be a daunting task—with the right tools, patience, and technique, you can remove it cleanly and even prep the space for something new! 🌱 Whether you’re tackling roots, avoiding damage to surrounding plants, or simply reclaiming your yard, you’ve got this.
The key is preparation, precision, and persistence—and now, you’re armed with all the know-how.
Ready to transform that overgrown corner? Take your time, follow the steps, and celebrate the fresh start! Next up: Plan your new landscaping project or share your before-and-after with fellow gardeners for some well-deserved bragging rights. Happy digging! 🌿✨