
Planting
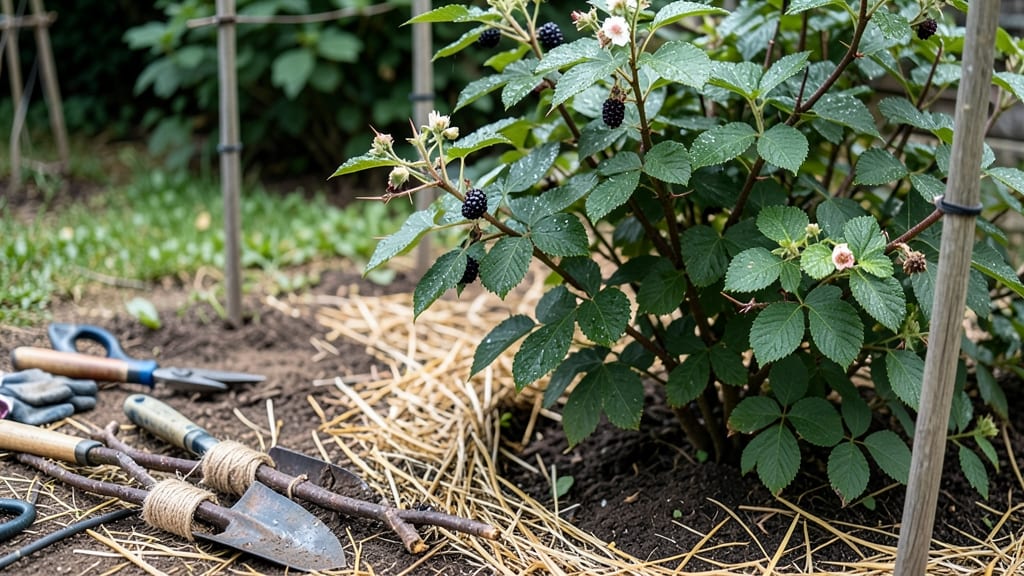
Planting a thriving blackberry bush 🫐 starts with the right guide—one that covers timing, soil, and spacing to set your plants up for a bountiful harvest in just a few seasons.
Struggling to grow blackberry bushes that actually produce fruit? You’re not alone. Most gardeners miss the three key factors that make or break success: planting in the dormant season, picking the right spot, and prepping the soil just right.
Skip any of these, and you’ll end up with leggy vines and no berries.
In this guide, I’ll walk you through the perfect planting window for your USDA Zone 6a climate, how to choose between thorny and thornless varieties, and the step-by-step process for planting that ensures strong roots and maximum fruit production.
Whether you’re a beginner or a seasoned gardener, you’ll leave here with a clear plan—no more guesswork, just healthy bushes and sweet, juicy berries by mid-summer.

Best time and location for planting blackberry bushes
Planting your blackberry bushes at the right time and location sets the foundation for a bountiful harvest. Unlike many fruits, blackberries thrive when planted during their dormant season, which means late winter or early spring before new growth begins.
This timing allows roots to establish before the plant focuses on producing fruit. If you live in a warmer climate (USDA Zones 7-10), fall planting is also an excellent option, as the cooler temperatures help roots settle in before summer heat arrives.
Choosing the right location for blackberries is equally critical. These vigorous plants need full sun exposure—at least 6-8 hours daily—to develop strong canes and sweet, flavorful berries. A spot with well-draining soil is non-negotiable, as blackberries despise soggy roots, which can lead to fungal diseases like root rot.
Additionally, ensure the area has room to grow, as mature blackberry bushes can spread 6-10 feet wide and reach heights of 6-15 feet with proper trellising.
| Factor | Ideal Condition | Notes |
|---|---|---|
| Planting Season | Late winter to early spring (after last frost) | Dormant planting ensures strong root growth before fruit production. |
| Alternative Season | Fall (Zones 7-10) | Plant 6-8 weeks before first frost for root establishment. |
| Sunlight Needs | 6-8+ hours of full sun | Partial shade reduces fruit quality and yield significantly. |
| Soil pH | 5.5-6.5 | Test and amend soil; blackberries prefer slightly acidic conditions. |
| Soil Type | Well-draining loam | Avoid clay or compacted soil; amend with compost or sand. |
| Spacing | 4-6 feet apart (rows 8-10 feet apart) | Proper spacing improves air circulation and reduces disease risk. |
| Wind Protection | Sheltered location | Strong winds can damage canes; plant near fences or trellises. |
When it comes to soil pH for blackberries, aim for a range of 5.5-6.5, which is slightly acidic.
Before planting, conduct a soil test to check your garden’s pH. If your soil is too alkaline, amend it with sulfur or peat moss to lower the pH. Blackberries also thrive in loamy soil rich in organic matter.
If your native soil is heavy clay or sandy, mix in compost or well-rotted manure to improve drainage and fertility. A 3-inch layer of mulch around the base of the plant helps retain moisture and regulate soil temperature, which is especially beneficial during hot summers.
Another critical factor is climate considerations. Blackberries are hardy perennials that can tolerate cold winters down to -15°F (USDA Zone 5), but they perform best in mild to moderate climates.
In hot, humid regions, choose thornless varieties like 'Natchez' or 'Arapaho' to reduce pest pressure and make harvesting easier. If you’re in a cooler climate, varieties like 'Cheyenne' or 'Black Satin' are excellent choices for their cold hardiness and disease resistance.
Always check the specific variety’s requirements before planting, as some thrive better in certain conditions than others.
For sunlight requirements, never compromise on full sun. Blackberries need at least 6 hours of direct sunlight daily to produce their best fruit. If your yard only offers partial shade, consider installing a trellis or arbor to maximize sun exposure.
The more sunlight your blackberry bushes receive, the sweeter and larger the berries will be. Additionally, full sun exposure helps prevent gray mold, a common fungal disease that thrives in damp, shaded conditions.
If you notice your blackberries developing a powdery gray fuzz on the fruit, it’s a sign they need more sun and better air circulation.
One common mistake gardeners make is planting blackberries in low-lying areas where water pools after rain. Poor drainage is a silent killer of blackberry bushes, leading to root rot and stunted growth. To avoid this, choose a slightly elevated spot or build a raised bed if your soil drains poorly.
If you’re planting in containers or pots, use a high-quality potting mix blended with perlite or sand to ensure excess water drains away quickly. Containers also allow you to control soil conditions more easily, making them a great option for gardeners with limited space or poor native soil.
Finally, consider the long-term growth habit of blackberry
Step-by-step blackberry bush planting process for beginners
Planting blackberry bushes correctly sets the foundation for a high-yielding, healthy plant. Whether you're growing thorny or thornless varieties, proper technique ensures strong root development and abundant fruit. Start by choosing a sunny, well-drained location with at least 6-8 hours of sunlight daily—this is critical for blackberry growth.
Before planting, prepare your soil pH between 5.5 and 6.5, which blackberries prefer. Amend heavy clay soil with compost or sand to improve drainage, while sandy soil benefits from organic matter like peat moss.
A trellis system is also essential to support the vigorous vines and improve air circulation, reducing disease risk.
Step-by-Step Planting Guide
-
Step 1: Prepare the Planting Site
Mark your planting area with 4-6 ft spacing between plants (or rows if planting multiple). Dig a hole twice as wide as the root ball but only as deep—blackberries dislike deep planting. -
Step 2: Amend the Soil
Mix 2-3 inches of compost into the bottom of the hole. For acidic soil, add sulfur or peat moss to adjust pH. Avoid fresh manure, which can burn roots. -
Step 3: Install a Trellis
Drive T-posts or stakes 6 ft into the ground along your planting row. Attach horizontal wires at 3 ft intervals to create a support lattice for vines to climb. -
Step 4: Plant the Blackberry Bush
Remove the plant from its container and loosen roots. Place it in the hole so the crown sits 1-2 inches above soil level. Fill with soil, tamping gently to eliminate air pockets. -
Step 5: Water Thoroughly
Water deeply until soil is evenly moist to 12 inches down. Mulch with 3 inches of wood chips to retain moisture and suppress weeds. -
Step 6: Train the Canes
Gently weave new canes through the trellis wires as they grow. Prune old canes to the ground in early spring to encourage new, productive growth.
🌱 Pro Tip: Plant on a slight slope to improve drainage and reduce fungal diseases.
After planting, water your blackberries every 3-5 days during dry spells, aiming for 1-2 gallons per plant. Avoid overhead watering to prevent leaf diseases. In the first year, focus on root establishment—resist the urge to fertilize heavily, as this can encourage weak, leafy growth instead of strong canes.
For thornless varieties, like 'Natchez' or 'Cheyenne,' handling is easier, but they still need vigorous pruning to control spread. If you planted thorny types, wear gloves and long sleeves when pruning to avoid scratches. Regular pruning also improves airflow, reducing blackberry rust and other fungal issues.
With proper care, your blackberry bushes will produce fruit within 1-2 years. The key to long-term success is consistent maintenance, including annual pruning, mulching, and monitoring for pests like spider mites or Japanese beetles. Happy planting! 🫐