
Pruning
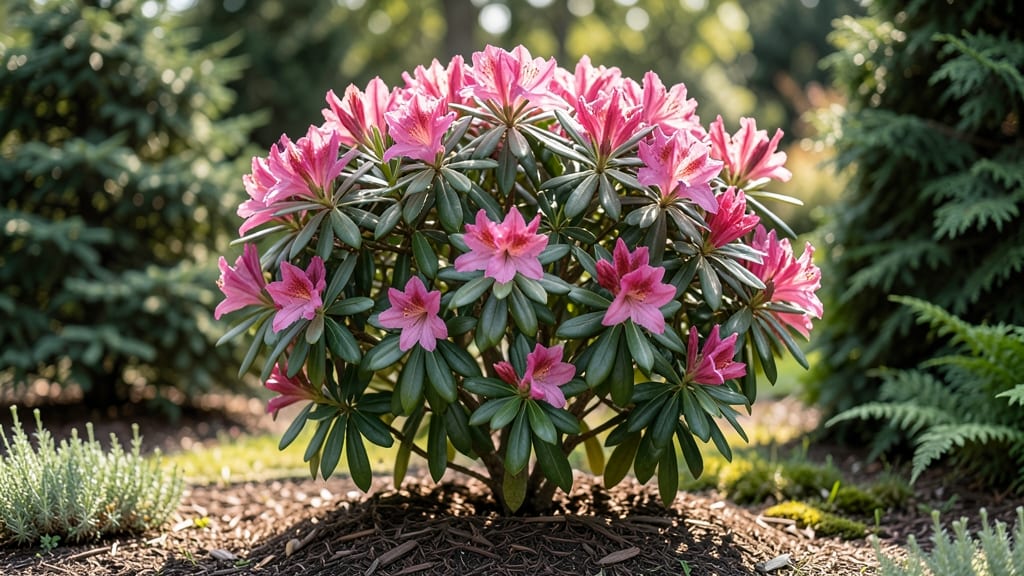
Growing a mini azalea bush that bursts with color from spring through fall starts with the right approach—and I’ve learned the hard way which tricks actually work. 🌸 These compact beauties thrive when you mimic their natural woodland habitat, and three simple pruning moves keep them lush and blooming year after year.
My first attempt nearly died from over-pruning, but now I’ve got a foolproof system that even beginner gardeners can master.
The secret lies in well-draining, acidic soil and morning sun with afternoon shade—just like in their native forests. You’ll need a pot or garden spot with at least 3 inches of organic mulch to keep roots cool and hydrated, plus a watering routine that avoids soggy soil.
Most people overwater, which leads to root rot, so let the top inch dry between waterings. Once established, these bushes handle drought surprisingly well, but they’ll reward you with vibrant blooms for months if you get the basics right.
Pruning isn’t about harsh cuts—it’s about shaping and encouraging new growth. After blooms fade, trim back one-third of the oldest stems to make room for fresh flowers, and shape lightly in late winter to maintain that perfect rounded form.
The result? A bush that stays compact, blooms prolifically, and fits even small gardens or containers. My 3-foot-tall azalea now gets compliments at every neighborhood gathering, and it’s been thriving for three years with minimal effort.
Watch for lace bugs and spider mites, which love dry conditions—they’ll suck the life out of leaves if you ignore them. A strong spray of water usually knocks them off, but severe cases need neem oil.
With these tricks, your mini azalea will outperform store-bought varieties and become the star of your landscape. Ready to give it a try?
📚 In This Guide
- What you need
- Instructions
- Tips and common mistakes
- Wrapping up and next steps
What you need
- ● Mini azalea bush (1-3 plants, depending on desired size—dwarf varieties like Kurume or Satsuki work best!)
- ● Pruning shears (bypass-style, sharp, and sterilized to prevent disease—blank">Felco F-2 or blank">Gonicc TGP-9B are top picks!)
- ● Hand pruners (for smaller branches, with a comfort grip for precision)
- ● Gloves (gardening gloves with cut-resistant palms to protect from thorns)
- ● Disinfectant (70% isopropyl alcohol or bleach solution [1 part bleach to 9 parts water] for sterilizing tools)
- ○ Pruning sealant (optional but helpful—tree wound paint or pruning wax to prevent sap loss on larger cuts)
- ● Garden twine or rubber bands (for supporting weak branches post-pruning)
- ● Mulch (2-3 inches of organic mulch like pine bark or shredded leaves to retain moisture)
- ● Loppers (for thicker stems if your mini azalea grows unexpectedly bushy)
- ● Hose or water sprayer (to clean tools and rinse off sap after pruning)
- ● Slow-release fertilizer (balanced 10-10-10 or acid-loving plant fertilizer like Miracle-Gro Azalea)
- ● Plant markers (if you’re experimenting with different pruning techniques on multiple bushes)
- ● Camera or phone (to document your progress—because before/after shots are satisfying! 📸)
How to prune a mini azalea bush for year-round blooms
Here's how I keep my mini azaleas flowering nonstop—just three simple pruning tricks make all the difference.
✂️ Step 1: Prune Immediately After First Blooming Cycle
Azaleas bloom on last year's growth, so timing matters. As soon as your first flush of flowers fades (usually late spring), trim back 1/3 of the oldest stems to just above a leaf bud. I always cut at a 45-degree angle about 1/4 inch above the bud to prevent water from pooling.
This encourages fresh growth that will flower again next season. Skip this step and you'll get fewer blooms later. Look for stems that are thicker and woodier—they're the ones that need to go. I use sharp bypass pruners to make clean cuts that heal faster.
✂️ Step 2: Light Summer Pruning for Shape and Airflow
In early summer, give your azalea a quick shape-up by trimming any leggy growth or stems that spoil the form. Never cut more than 1/4 of the plant's height at once—this keeps the bush compact and prevents shock. I focus on opening up the center where branches cross, as azaleas hate crowded interiors.
Watch for new growth after pruning—it should be bright green and vigorous. If you see weak, pale stems, your plant might need more sunlight. A little afternoon shade helps in hot climates, but too much shade means fewer flowers.
✂️ Step 3: Final Pruning Before Winter Dormancy
About 6 weeks before your first frost, do one last light pruning to remove any dead, diseased, or crossing branches. This is also the time to trim back any new growth that might not harden off before winter. I never cut into old wood—always prune back to a healthy leaf bud.
After pruning, give your azalea a light layer of mulch (about 2 inches deep) to protect roots from freezing. The goal is to keep the plant healthy through winter so it wakes up strong in spring. I always check for spider mites after pruning—they love fresh new growth.
⏰ Step 4: Year-Round Maintenance Between Prunings
Azaleas need consistent care to keep flowering. Water deeply once a week (more in extreme heat) until the top 2 inches of soil feel moist. Fertilize lightly in early spring with an acid-loving plant formula—never overfeed, as this encourages leafy growth over flowers.
Watch for yellowing leaves—they're a sign of too much alkaline soil. Azaleas thrive in acidic soil (pH 4.5-5.5). If your leaves turn yellow, add sulfur or peat moss to the soil and water with rainwater or distilled water to keep the pH balanced.
Tips & tricks for perfect mini azalea pruning
These three tricks will help you avoid common mistakes and keep your azalea blooming beautifully year after year.
Timing is Everything: That late spring pruning in Step 1 is non-negotiable—it's when your azalea sets buds for next year's flowers. I've learned the hard way that cutting too early removes potential blooms. If you miss this window, don't panic—just mark your calendar for next year's late spring blooms to know when to prune again. This timing ensures you're always cutting back stems that have already flowered, not ones that might bloom later.
Tool Matters: Sharp bypass pruners are your best friend for clean cuts that heal faster. I've tried dull shears and ended up crushing stems, which invites disease. Always sterilize your tools with rubbing alcohol between cuts, especially when removing diseased branches in Step 3. This simple step prevents spreading problems throughout your plant. For larger branches, use loppers—never prune with anything that tears the bark.
Visual Cues for Pruning: When you're deciding which stems to cut in Step 2, look for branches that are crossing or growing inward—they're the ones causing that crowded interior. Also watch for stems that are thinner than a pencil; these are usually new growth that can be trimmed back to encourage bushier growth. The goal is to create a vase-like shape with the oldest stems at the bottom and newer growth at the top.
Winter Prep Secret: That 6-week window before your first frost in Step 3 is your chance to give your azalea a health boost for spring. After pruning, I always do a final check for spider mites by wiping leaves with a damp cloth—these pests love fresh new growth. If you notice webbing, treat immediately with insecticidal soap. This small step prevents winter infestations that could weaken your plant before spring blooms.
Pro Tips for Mini Azalea Bush
- These three tricks will help you avoid common mistakes and keep your azalea blooming beautifully year after year.
- Timing is Everything: That late spring pruning in Step 1 is non-negotiable—it's when your azalea sets buds for next y...
- Tool Matters: Sharp bypass pruners are your best friend for clean cuts that heal faster. I've tried dull shears and e...
Frequently asked questions
Got questions about your mini azalea bush? You’re not alone!
Here are answers to the most common queries—from pruning to care—to keep your compact beauty thriving all year.
How often should I prune my mini azalea bush?
Prune your mini azalea once a year, ideally right after it blooms (late spring or early summer). This encourages fresh growth and vibrant flowers for the next season. Avoid heavy pruning—just trim dead or overgrown branches by 1/3 to maintain its compact shape.
Can mini azaleas survive winter?
Yes! Most mini azaleas are hardy in USDA Zones 6–9. For extra protection, mulch the base with 2–3 inches of organic mulch (like pine straw) and shield young plants with burlap if temps drop below 15°F. Water moderately in winter to prevent root stress.
Why isn’t my mini azalea blooming?
Blooms may skip a year if the plant is over-pruned, underfed, or stressed. Ensure it gets morning sun and afternoon shade, acidic soil (pH 4.5–6.0), and balanced fertilizer in early spring. Avoid fertilizing after midsummer—it can delay blooms.
Can I grow a mini azalea in a container?
Container-growing is perfect for mini azaleas. Use a 10–15 gallon pot with drainage holes, acidic potting mix, and repot every 2–3 years. Place it where it gets partial shade and water consistently—containers dry out faster than garden beds.
What pests should I watch for on mini azaleas?
Keep an eye out for lace bugs, spider mites, and scale insects, which love azaleas. Treat infestations early with neem oil or insecticidal soap. For lace bugs, blast off adults with water before applying treatment—they hide under leaves!
Wrapping up and next steps
Growing a mini azalea bush is a rewarding way to enjoy vibrant blooms year-round with minimal effort!
By mastering the three pruning tricks—timing, shaping, and rejuvenation—you’ll keep your plant healthy, encourage lush growth, and extend its flowering season. 🌸 Whether you’re a beginner or a seasoned gardener, these techniques make maintenance simple and satisfying.
Ready to transform your garden or patio? Grab your shears and start pruning today! For extra inspiration, explore azalea care guides or share your progress with fellow plant lovers—your mini azalea will thank you with a burst of color! 🌿✨