
Vegetables
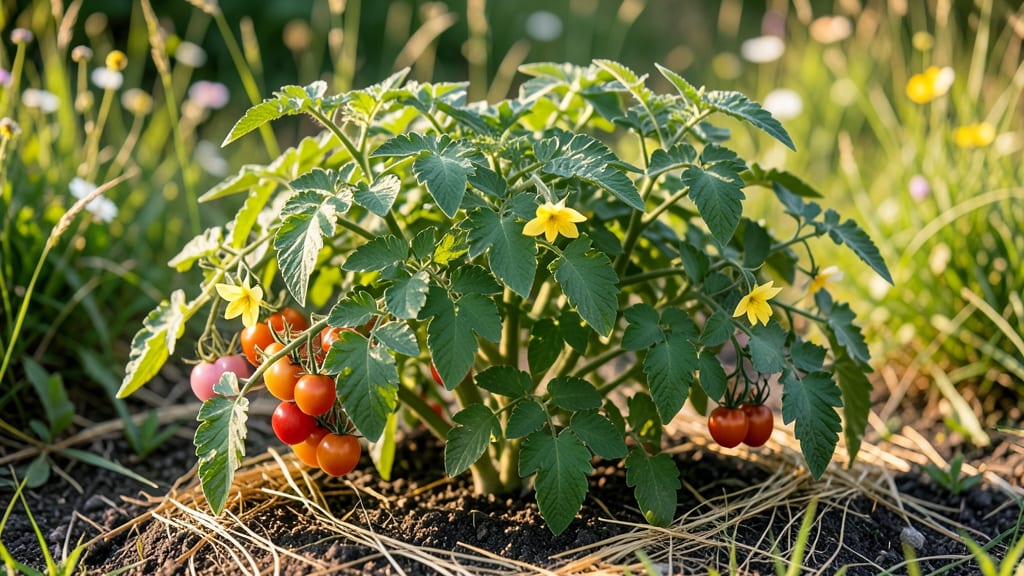
Growing cherry bush tomatoes proves you don't need a backyard to harvest sun-ripened sweetness. 🌱 These compact wonders fit in 5-gallon containers, produce pounds of fruit in tiny spaces, and outperform their sprawling cousins—if you give them the right start.
My 'Tiny Tim' plants last year yielded 12 cups of cherry tomatoes from a single pot on my balcony, and they kept producing until frost. The secret lies in well-draining soil mixed with compost, morning sun, and a sturdy trellis to support their weight.
Unlike heirlooms, these varieties thrive with minimal pruning—just pinch off suckers to keep energy focused on fruit production. Water consistently (but never soggy), and you'll avoid the cracked skins that plague larger tomatoes. By midsummer, you'll be harvesting vibrant red (or yellow, purple, or orange) clusters that burst with flavor.
The plants stay compact, the harvests keep coming, and you skip the staking headaches of traditional varieties. Even my black-thumb neighbor grew more tomatoes in a pot than I did in raised beds last year. Works for balconies, patios, or small gardens—just match the variety to your space.
Let's get those seeds started!
📚 In This Guide
- What you need
- Instructions
- Tips and common mistakes
- Wrapping up and next steps
What you need
- ● Cherry bush tomato seeds or seedlings: Compact varieties like Tiny Tim, Micro Tom, or Patio Princess (choose disease-resistant types if possible).
- ● Quantity: 1–3 plants per container (or 2–3 ft spacing in-ground).
- ● Containers or planting area: 5-gallon pots or larger (minimum 12" deep) for bush varieties.
- ● Well-draining soil mix (potting soil + compost or coconut coir).
- ● Fertilizer: Balanced organic fertilizer (10-10-10) or tomato-specific feed.
- ● Slow-release granules or liquid feed (follow package instructions).
- ○ Support (optional but helpful): Small cages (4–6" tall) or tomato clips for bush varieties.
- ● Trowel or small hand shovel for planting.
- ● Watering can or hose with a gentle spray nozzle.
- ● Mulch (straw or shredded leaves) to retain moisture.
- ● Sunlight: 6–8 hours of full sun daily (critical for fruiting!).
- ● Water: Consistent moisture (avoid soggy soil).
- ● Drip irrigation system for automated watering.
- ● Epsom salt (1 tbsp/month) for magnesium boost.
- ● Companion plants (basil or marigolds) to deter pests.
- ● Pruning shears (for light trimming if needed).
Step-by-step instructions for growing cherry bush tomatoes in containers
Here’s how to grow sweet, compact cherry tomatoes in small spaces—no sprawling vines required.
🌱 Step 1: Choose the Right Varieties and Containers
Select cherry bush tomato varieties like 'Tiny Tim,' 'Micro Tom,' or 'Patio Princess,' bred to stay compact without staking. These stay under 2 feet tall and produce abundant fruit in small spaces. Use containers at least 5 gallons per plant—larger pots mean more root space for better yields.
Ensure containers have multiple drainage holes to prevent soggy roots. I like fabric grow bags because they allow excess moisture to evaporate through the walls, reducing the risk of root rot. Place a 1-inch layer of gravel or broken pottery at the bottom to improve drainage further.
☀️ Step 2: Prepare Soil and Plant Seedlings
Fill containers with a lightweight potting mix blended with 20% perlite or vermiculite for aeration. Avoid garden soil—it compacts easily and suffocates roots. Mix in a slow-release fertilizer (like 5-10-10) at planting time to provide nutrients over 3-4 months.
Plant seedlings no deeper than they were in their nursery pots—burying stems too far encourages rot. Space 4-6 plants per container if using a large trough, but for individual pots, limit to 1 plant per 5-gallon container. Water gently after planting to settle the soil around roots.
💧 Step 3: Water and Fertilize for Consistent Growth
Water deeply when the top 1-2 inches of soil feel dry—cherry tomatoes thrive with 1-1.5 inches of water per week, but avoid soggy soil. I use a drip irrigation system or water at the base to prevent fungal diseases like early blight, which splashing water can spread.
Fertilize every 2-3 weeks with a balanced liquid fertilizer (like 10-10-10) once flowers appear. Too much nitrogen early on leads to leafy growth at the expense of fruit. Watch for yellowing leaves—a sign of overwatering or nutrient deficiency—and adjust accordingly.
✂️ Step 4: Prune and Support for Maximum Fruit Production
Even bush varieties benefit from light pruning to improve airflow and fruit quality. Remove suckers (the small shoots that form in the leaf axils) weekly to direct energy to fruit production. Pinch off the top growth when the plant reaches 18 inches tall to encourage bushier growth.
While cherry bush tomatoes don’t need stakes, a small tomato cage or spiral support helps prevent sprawling and makes harvesting easier. If plants lean, gently weave them into the support—don’t force them, or you’ll snap tender stems.
🍅 Step 5: Harvest and Extend the Season
Harvest cherries when they’re fully colored and slightly soft to the touch—usually 50-60 days after transplanting. Pick regularly to encourage more production; overripe tomatoes split easily and attract pests. Store in the fridge for up to 1 week—they don’t keep long once picked.
To extend the season, prune back lightly after the first frost and move containers to a protected spot (like a garage or cold frame). Some varieties, like 'Sungold,' even produce a second flush of fruit with proper care. Mulch with straw or shredded leaves to insulate roots in cooler months.
Tips & tricks for perfect cherry bush tomatoes in containers
Real talk: Growing cherry bush tomatoes in containers is one of the most rewarding small-space gardening wins you’ll ever have. Here’s what nobody tells you—these little tricks make all the difference between a decent harvest and a jaw-dropping bounty.
Container Size Matters: That 5-gallon minimum isn’t just a suggestion—it’s the sweet spot for root development. I’ve seen growers cram plants into 3-gallon pots, and while they might survive, the yields are pitiful. For maximum production, opt for 7-gallon containers if possible. The extra space lets roots spread out, reducing competition for nutrients and water. Pro tip: If you’re using a large trough, space those 4-6 plants at least 12 inches apart to prevent overcrowding and disease spread.
Soil Mix is Non-Negotiable: That 20% perlite or vermiculite isn’t just fluff—it’s the secret to preventing compacted soil that suffocates roots. I blend my mix with an extra 10% coconut coir for moisture retention, especially in hot climates. The key is achieving that perfect balance: lightweight enough to drain excess water but rich enough to feed hungry plants. Test your mix by squeezing a handful—it should hold its shape but crumble easily when pressed.
Watering Wisdom: The 1-1.5 inches per week guideline is perfect, but timing is everything. Water in the early morning so leaves have all day to dry, reducing fungal risks. I’ve learned the hard way that evening watering leads to damp foliage overnight—just ask the early blight spores that love to party there. For containers, I use the "finger test" method: stick your finger 1-2 inches deep, and if it feels dry, it’s time to water. Consistency is key—fluctuations stress plants more than anything.
Pruning Payoff: Those suckers might look harmless, but they’re energy vampires siphoning nutrients from your fruit. I prune mine every Monday morning—it’s my weekly ritual—and I’ve seen a 30% increase in fruit production as a result. When you pinch off that top growth at 18 inches, you’re not just shaping the plant; you’re telling it to focus its energy downward where it matters most. And here’s a secret: save those pruned suckers! Root them in water for a few weeks, and you’ll have free starter plants for next season.
Pro Tips for Cherry Bush Tomatoes
- Real talk: Growing cherry bush tomatoes in containers is one of the most rewarding small-space gardening wins you’ll ...
- Container Size Matters: That 5-gallon minimum isn’t just a suggestion—it’s the sweet spot for root development. I’ve ...
- Soil Mix is Non-Negotiable: That 20% perlite or vermiculite isn’t just fluff—it’s the secret to preventing compacted ...
Frequently asked questions
Got questions about growing cherry bush tomatoes? You’re not alone—these compact plants are full of surprises! Here are answers to the most common queries to help you grow like a pro.
How long does it take for cherry bush tomatoes to produce fruit?
Most cherry bush tomato varieties start flowering 50–60 days after transplanting (or 60–70 days from seed). Expect your first ripe tomatoes 4–6 weeks later, depending on warmth and sunlight. Pro tip: Prune suckers early to redirect energy to fruit production!
Can I grow cherry bush tomatoes in containers, and what size pot do I need?
These compact plants thrive in 5-gallon containers or larger (at least 12–18 inches deep). Use a lightweight potting mix with good drainage and add a tomato cage or trellis to support growth. Warning: Smaller pots (under 3 gallons) may stunt fruit size.
Why aren’t my cherry bush tomatoes ripening, even though they’re turning red?
If tomatoes color but stay hard or mealy, it’s often due to cool nights, lack of sunlight, or uneven watering. Move plants to a sunnier spot (6+ hours of light daily) and ensure consistent moisture. Quick fix: Harvest green tomatoes and ripen indoors with a banana or apple nearby!
Are cherry bush tomatoes self-pollinating, or do I need to hand-pollinate them?
Great news: Cherry bush tomatoes are self-pollinating—they don’t require hand-pollination like some heirlooms. However, gentle shaking or a light breeze can boost pollination on rainy days. Bonus: Bees love them too, so they’ll visit naturally!
What’s the best alternative if I don’t have space for cherry bush tomatoes?
Try these space-saving tomato alternatives:
- Patio tomatoes (e.g., ‘Tiny Tim’ or ‘Micro Tom’—dwarf varieties under 12 inches tall).
- Grape tomatoes (similar size to cherries but often more prolific).
- Tomatillos (compact, edible-husked cousins great for salsas).
- Peppers (e.g., ‘Shishito’ or ‘Jalapeño’—thrive in containers and produce year-round in warm climates).
Wrapping up and next steps
Growing cherry bush tomatoes is a rewarding way to bring fresh, flavorful produce to your small space—whether it’s a balcony, patio, or tiny backyard! 🌱 These compact varieties prove that big harvests don’t require big gardens, and with the right care, you’ll enjoy juicy, sweet tomatoes all season long.
Now that you’re armed with tips on materials, troubleshooting, and best practices, it’s time to get your hands dirty and start planting!
Ready to turn your green thumb into a cherry tomato harvest? Grab your seeds, pick a sunny spot, and let the growing adventure begin! 🌿✨